Anemone Growing Guide: From Corm to Bloom
Anemones—it’s a fun word to say and quite the tongue twister for some. When in doubt, I always tell people to think of where Nemo lives. Although very different types of anemones, they share the same pronunciation. Fun fact: I’m obsessed with both anemone flowers and the ocean creatures alike!
The variety of anemones we grow as annuals for cut flower production is the Anemone coronaria. With their large flower heads and striking centers, these blooms seem to stare right through you. They are a staple of spring and early summer, and honestly, I don’t know what I’d do without them during those months.
Today, I’m sharing my love for these incredible flowers. If you’ve been on the fence about growing them, this guide will give you all the information you need to grow them successfully.
Out of all the spring annuals we grow, anemones handle our harsh high desert climate the best. They thrive despite the extreme temperature swings we often experience, going from winter to summer in a single day. However, like any crop, there are some tricks to growing and harvesting anemones successfully, and I’m here to share those with you!
Note: This post contains affiliate links. If you make a purchase through these links, I may earn a small commission at no additional cost to you. Thank you for supporting our farm!
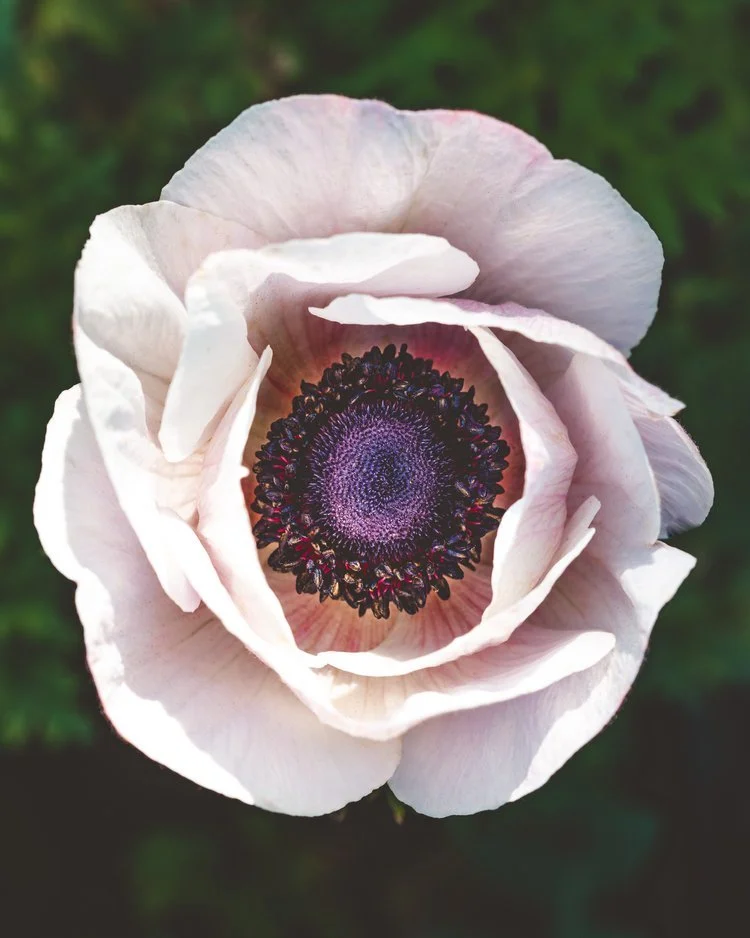
A close-up of the stunning simplicity of a white anemone with its signature black center.
What Are Anemone Corms?
Anemones are most commonly grown from corms, which function much like tubers. Growing from corms ensures you’ll achieve the specific colors, forms, and traits you see in the mother plant, making them a reliable option for consistent and predictable results.
Growing Anemones from Seed
While Anemone coronaria can technically be grown from seed, it requires patience and a willingness to embrace the unknown. Seeds can take longer to germinate and may not always result in successful or predictable blooms. Additionally, colors and forms are not guaranteed, so if consistency is your goal, corms are the way to go.
That said, growing anemones from seed can be a fun experiment if you’re up for it and not too concerned about the outcome. However, if you’re looking for reliable results with fewer steps between propagation and harvest, corms are the best choice.
A vibrant mix of anemones arranged in a simple glass vase, bringing fresh spring vibes to the workspace.
When, Where, and What Size Anemone Corms to Purchase
Purchasing corms is the first step to a successful anemone harvest. As a flower farming business or dedicated home gardener, timing, sourcing, and size selection are critical to your success.
When to Purchase Anemone Corms
If you’re planning to grow commercially, it’s best to order your corms at least a year in advance. Here in the U.S., most wholesalers begin offering anemone corms for the next growing season during late winter or spring, with shipments arriving in the fall. For smaller-scale growers, retailers typically start selling corms in the fall.
Pro Tip: High-demand varieties and larger-sized corms sell out quickly, so placing your order as soon as it’s available can save you from disappointment.
Where to Purchase Anemone Corms
Anemone corms are available through both wholesalers and retailers:
Wholesalers: Ideal for commercial growers, wholesalers often sell in increments of 100 corms or more, with minimum order requirements. These corms are usually of higher quality and come at a better price per corm.
Retailers: Smaller-scale growers or hobbyists can find corms in quantities as low as 25, making this a more accessible option for personal use.
Pro Tip: If you already source ranunculus corms, check with the same suppliers for anemone corms. Many wholesalers and retailers carry both, making it easier to consolidate your orders.
What Size Anemone Corms Should You Choose?
Anemone corms come in sizes such as 2/3, 3/4, 4/4, and 4/5 centimeters, with larger corms producing more robust plants.
Larger Corms (4/4, 4/5): These produce sturdier plants with higher yields and longer stems, making them ideal for commercial growers or harsher climates.
Smaller Corms (2/3, 3/4): These are less expensive and may work well in moderate climates but can result in smaller plants and reduced yields.
Our Recommendation: For most growers, especially those in challenging climates, we suggest avoiding anything smaller than 3/4. While larger corms cost more upfront, they tend to deliver better results in terms of plant health, yield, and resilience.
Pro Tip: Start your search early! High-demand varieties and larger-sized corms often sell out quickly, so placing your order as soon as it’s available can save you from disappointment.
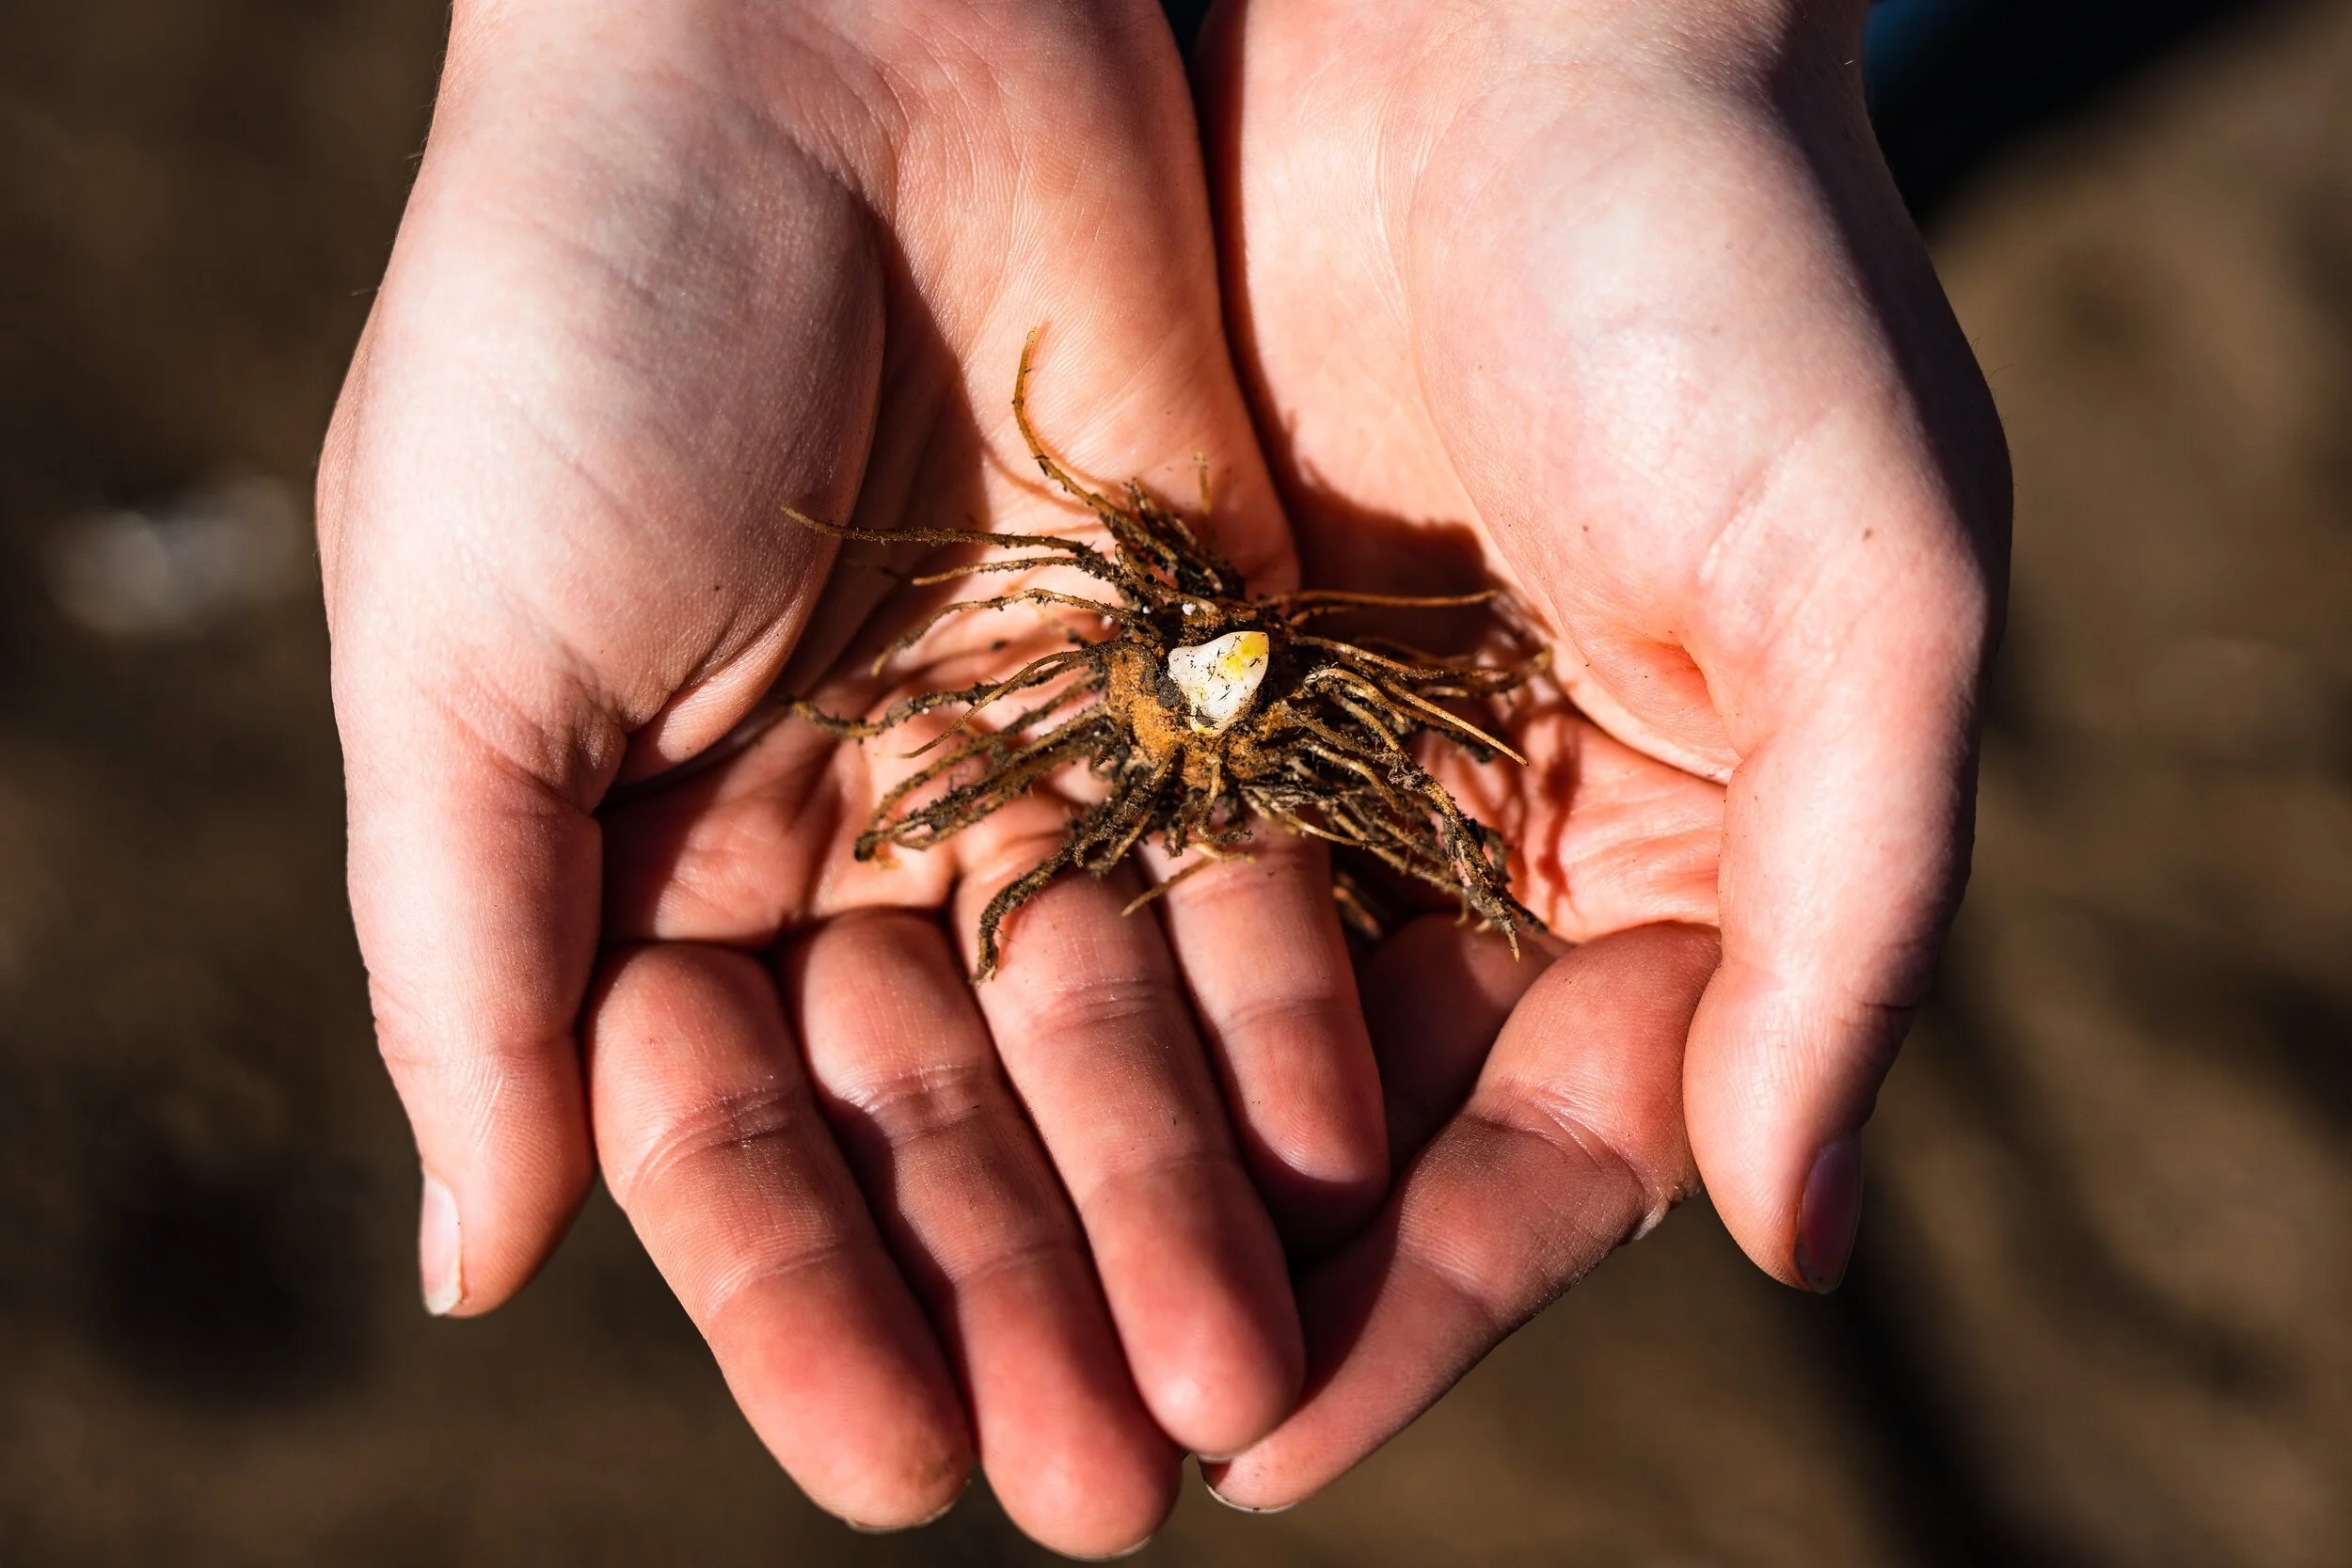
Anemone corms arrive looking like dried treasures, ready to soak and sprout.
What Anemone Corms Look Like Upon Receiving
When your anemone corms arrive, don’t be surprised if they look like shriveled little acorns. This dehydrated state keeps them dormant during shipping and storage, preserving them until you’re ready to wake them up for planting.
To bring them to life, you’ll need to rehydrate the corms by soaking them in water for 3–4 hours. Once soaked, they’ll plump up, signaling they’re ready for the next step.
For a detailed step-by-step guide, check out our Pre-Soaking Corms Blog.
Next Steps: Planting or Pre-Sprouting
After soaking, you have two options:
Direct Planting: Place the soaked corms directly into their prepared garden beds.
Pre-Sprouting: This extra step gives your anemones a jumpstart by encouraging early root growth in a controlled environment. Pre-sprouting is particularly beneficial in colder climates or if you want to minimize the risk of corms rotting in the ground.
Pro Tip: Pre-sprouting works wonders for getting healthier plants and earlier blooms. For more details, check out our Pre-Sprouting Anemone Corms Guide.
Storing Anemone Corms
If you don’t plan to plant your corms right away, proper storage is essential to keep them viable. Store the corms in a cool, dark, and dry location with good airflow. Aim for temperatures around 50–60°F to maintain dormancy. Avoid areas with high humidity, as this can lead to mold or rot.
When stored under ideal conditions, anemone corms can remain viable for two to three years. Over time, they may lose some vigor, so it’s best to use them within this timeframe for optimal results.
Pro Tip: Check on stored corms periodically to ensure they remain dry and intact until planting season.
A farmer-florist’s spring arrangement showcasing the season’s finest blooms and textures.
Which Varieties of Anemones Should I Choose?
Anemones come in a stunning array of colors and forms, making them one of the most versatile flowers for both bouquets and event work. The most commonly grown type for cut flowers is Anemone coronaria, which includes both single and double varieties with light or dark centers.
Choosing Colors and Forms
Colors: Anemones are available in shades of red, pink, magenta, icy blue, white, burgundy, and deep purple.
Forms: Decide between singles (simple elegance) or doubles (fuller, ruffled appearance).
Top Requests: White anemones with black centers are an enduring favorite, especially for weddings, where they add striking contrast to arrangements.
Popular Anemone Varieties
Galilee Series: Known for its wide range of colors, including stunning reds, whites, and blues, with strong, reliable stems perfect for cut flower production.
Mistral Series: Favored for its double blooms, this series offers a fuller, ruffled appearance and works beautifully in event designs.
Panda: A striking white variety with black centers that remains a top choice for wedding florals.
Selecting Varieties for Your Market
When choosing varieties, consider:
Client Preferences: Popular varieties like white, blush, and pastel tones are highly requested for weddings and events.
Seasonal Holidays: Red and pink varieties are perfect for Valentine’s Day, while deeper hues like burgundy suit autumn-themed arrangements.
Growing Needs: Some varieties are known to produce more consistently or thrive better in specific climates, so check with your supplier for recommendations.
Pro Tip: Keep track of customer trends and plan your corm orders around the colors and varieties that align with your market needs.
A vibrant row of anemones in full bloom, capturing the essence of springtime beauty.
When to Plant Out Anemone Plants
Once you’ve soaked or pre-sprouted your anemone corms, it’s time to plant them out into their growing beds. The timing for planting anemones depends on your climate and desired harvest window.
Fall Planting for Zones 7 and Above
Anemones are cold hardy down to Zone 7, making fall planting a great option for growers in milder climates. By planting in the fall, the corms have time to establish roots before going dormant during winter, setting the stage for early spring blooms.
Seasonal Benefits: Fall-planted anemones can bloom earlier, aligning perfectly with events like Valentine’s Day or early spring weddings.
Late Winter to Early Spring Planting for Cooler Climates
For Zones 6 and below, planting in late winter or early spring is often safer, especially if harsh winters or fluctuating temperatures are common. While blooms may arrive slightly later, this approach helps protect plants from freeze damage.
Pro Tip: Pre-sprouting corms can give them a jumpstart, allowing you to plant them out as soon as soil conditions are favorable.
Infrastructure to Protect Anemones
Anemones thrive when given extra protection in unpredictable weather conditions.
Use micro tunnels, double low tunnels, or high tunnels to shield plants from wind, snow, and freezing rain.
In climates that warm up quickly, consider adding shade cloth to extend the harvest window and protect plants from excessive heat.
Recommendations:
Pro Tip: For more ideas on extending your growing season and protecting anemones in challenging climates, check out our Season Extension Guide.
Succession Planting Anemones
Anemones are a great candidate for succession planting, allowing you to enjoy a steady supply of blooms throughout the season. Their production peaks for about 4 weeks before they begin to taper off with smaller, less consistent flowers.
How to Plan Successions
If your climate allows, we recommend planting anemones in 4-week intervals starting in the fall and continuing through late winter or early spring.
Fall Planting: Ideal for Zones 7 and above to get early blooms in the spring.
Winter to Early Spring Planting: Extend the harvest window in Zones 6 and below or for areas with short springs.
Factors to Consider for Successions
Climate: Your local weather patterns will dictate how many successions you can realistically achieve. Warmer zones can often handle more.
Infrastructure: Tunnels or shade cloth can help protect multiple successions from weather extremes.
Market Needs: If you’re growing for weddings or holidays, plan successions to align with peak demand for specific colors and varieties.
Pro Tip: Track your planting dates and bloom cycles in a spreadsheet to refine your succession planting strategy over time. For more detailed tips and strategies, check out our Advanced Guide to Succession Planting.
A pre-sprouted anemone corm, ready to be planted for a season of stunning blooms.
Planting Anemones
With soaked or pre-sprouted corms in hand, it’s finally time to plant your anemones! Preparing your growing beds properly and planting at the correct depth will set the stage for healthy, productive plants.
Preparing the Growing Bed
Anemones thrive in well-drained soil rich in organic matter. Before planting, prepare your beds with:
Compost: Add a layer of quality compost to improve soil structure and fertility.
Fertilizer: Use a balanced, slow-release fertilizer to support steady growth.
Drip Irrigation: Lay down drip tape or a similar system before planting to ensure efficient watering, especially in cooler months when overhead watering can be less effective.
Pro Tip: If you’re new to transplanting seedlings, check out our Transplanting Seedlings Blog for additional tips to ensure strong, healthy plants.
Planting Depth and Spacing
Depth: Plant corms about 1–2 inches deep, with the pointy side of the corm down.
Spacing: Space plants 4–9 inches apart. We’ve found a 7x7-inch spacing works well in our high desert climate, balancing airflow with efficient use of space.
Pro Tip: In humid or high-moisture climates, give plants more room to improve airflow and reduce the risk of fungal issues.
Alternative Growing Methods
For smaller-scale growers or space-saving setups, anemones can also be grown in crates. Use well-draining soil and space the corms more tightly, as crates naturally provide better air circulation.
Note: Crate growing and succession planting methods outlined here apply to ranunculus as well, making these techniques versatile across spring-blooming crops.
A close-up of a rotting anemone corm—highlighting the importance of proper storage and care.
Common Challenges When Growing Anemones
Like all flowers, anemones come with their challenges. While they’re one of the more resilient spring blooms, there are a few common obstacles growers face when cultivating these beauties.
Cold, Soggy Conditions
Anemones don’t like having cold, soggy feet. Prolonged wet conditions in colder months can lead to corm rot or fungal diseases.
Solution: Ensure well-draining soil and avoid overwatering. Use tunnels to protect plants from excessive rain or snow.
Heat Stress
Consistent temperatures over 80°F can cause anemones to stop flowering and begin dying back.
Solution: Add shade cloth during heat waves to reduce stress and extend the growing season.
Pests
Thrips and aphids are particularly drawn to anemones, with thrips causing unsightly browning on delicate petals. Earwigs, beetles, slugs, and whiteflies are also common nuisances.
Solution: Implement an Integrated Pest Management (IPM) system. Pyganic, spinosad, and neem oil can be effective, along with beneficial nematodes and crop rotation to reduce pest pressure.
Fungal Issues
Anemones are prone to stem rot, botrytis, and other fungal diseases, especially in humid or wet conditions.
Solution: Preventative fungicide treatments during the soaking process and routine sprays during the season can help keep fungal issues at bay.
Splitting Stems
Stem splitting can occur due to calcium deficiencies or inconsistent watering, leaving stems weak and prone to collapse.
Solution: Incorporate calcium amendments into your soil and maintain consistent irrigation to avoid sudden moisture fluctuations.
Pro Tip: Regular scouting and quick intervention are key to overcoming challenges with anemones.
The season’s first harvest of anemones.
Harvesting and Post-Harvesting Care of Anemone Flowers
After months of care and attention, your anemones are finally ready to harvest! Knowing the proper harvest stage and post-harvest practices ensures you get the longest vase life and highest quality blooms.
Harvesting Stage of Anemone Flowers
Anemones can be tricky when it comes to timing the harvest. If picked too early, the flowers may flop and fail to open. The best time to harvest is when:
The flower’s “collar” (the small leaf below the bloom) has developed at least 1/4 inch of stem between it and the bloom.
For longer vase life, harvest blooms that have opened and closed 1–3 times on the plant.
Pro Tip: Anemones often start their season by producing shorter stems, but subsequent blooms will grow taller as the plants mature.
How to Harvest Anemones
Use clean, sharp clippers or a knife to cut stems down to the base of the plant.
Harvest early in the morning when the flowers are most hydrated.
Bundle harvested stems in groups of 10 for easy processing and handling.
Post-Harvest Care of Anemone Flowers
Proper post-harvest care ensures your flowers stay fresh for as long as possible:
Water Levels: Fill buckets with only 2–3 inches of water to prevent the stems from getting mushy.
Water Treatment: Use a floral preservative, such as Chrysal CVBN tablets, to reduce bacterial growth.
Cooling: Store flowers in a cooler set to 38–40°F for up to 5 days. For shorter-term storage, a cool, dark room works well.
Ethylene Sensitivity: Anemones are ethylene-sensitive, so avoid storing them near ripening fruit or other ethylene-producing items.
Expected Vase Life
When properly harvested and cared for, anemones have an impressive vase life of 5–7 days with the use of flower food.
Pro Tip: If flowers are too cold and stay closed after harvest, let them warm up slightly before designing.
Anemones in Floral Design
Anemones are a designer’s dream, offering vibrant colors, elegant forms, and versatility in arrangements. Whether used as a focal flower or a supporting element, they elevate any bouquet or centerpiece with their unique charm.
How to Use Anemones in Design Work
Focal Flowers: Their bold blooms and striking centers make anemones stand out in bridal bouquets and centerpiece arrangements.
Supporting Elements: Anemones work beautifully as disk flowers, complementing other spring favorites like ranunculus and tulips.
Color Pairing: Their wide range of colors makes them easy to pair with nearly any palette, from soft pastels to bold jewel tones.
Longevity in Arrangements: With proper care, anemones hold up beautifully in both mixed arrangements and as stand-alone blooms in bud vases, making them versatile for event work or subscriptions.
Special Considerations
Delicate Petals: Anemones have thin, delicate petals that can bruise easily, so handle them with care. To prevent damage during transport, wrap blooms lightly in tissue paper.
Pollen Mess: The dark centers can shed pollen, which may create challenges in wearables like corsages. For this reason, we typically avoid using anemones in wearable designs.
Water Tubes for Installations: In large-scale floral installations, anemones benefit from being placed in water tubes to ensure hydration and prolong their appearance.
Bloom Behavior: Anemones may close in cooler conditions or at night. Allow time for blooms to reopen in warmer environments before setting them into arrangements.
Pro Tip: If flowers are slow to open after being stored in a cooler, let them warm up at room temperature for a few hours before arranging.
Why Anemones Are Highly Requested
White anemones with black centers are among the most sought-after blooms for weddings, adding a modern and sophisticated touch. They’re often requested right behind other spring staples like ranunculus and tulips, and their long vase life makes them a reliable choice for both events and subscriptions.
A romantic spring bridal bouquet against a breathtaking backdrop of moody skies, the cool temperature kept the anemone flower closed.
When the Plants Are Done
As the season winds down, anemones will naturally start to fade, signaling their time in the garden is over. The foliage will yellow and die back, and blooms will slow to a halt. At this point, it’s time to remove the plants to make way for your next crop rotation.
Pro Tip: Clear out spent anemones promptly to prevent any leftover plant material from harboring pests or fungal issues that could impact future plantings.
Can I Save Anemone Corms?
While it’s technically possible to dig up and save anemone corms for the following season, we generally don’t recommend it. Anemone corms are more prone to rot during storage compared to ranunculus corms, particularly if they’ve been exposed to excess moisture or inconsistent conditions.
If you decide to save them:
Allow the plants to fully die back.
Dig up the corms carefully to avoid damage.
Clean off excess soil, rinse gently, and let them dry completely in a well-ventilated space.
Store the corms in a cool, dark, and dry location (around 50–60°F).
Important Note: Many anemone corm varieties are patented, meaning you are not legally allowed to save and replant them. Always check the patent status with your supplier before attempting to store corms for future use.
Our Recommendation: Due to the challenges of successful storage, the higher risk of rot, and potential patent restrictions, we find it more reliable to purchase fresh anemone corms each season.
A timeless spring arrangement combining classic blooms and rustic charm.
Embracing the Beauty of Anemones
Anemones are a true spring treasure, bringing bold colors, delicate textures, and unmatched versatility to the garden and design work. While they require a bit of attention and care, the rewards are well worth it. From their early blooms to their standout presence in arrangements, these flowers are a must-have for any grower or florist.
Whether you’re growing them for weddings, subscriptions, or simply to enjoy in your garden, anemones are sure to win you over with their charm and elegance. We hope this guide has equipped you with the knowledge and confidence to grow your best crop yet!
Helpful Resources:
Pre-Soaking Corms Blog: Learn how to properly hydrate your anemone corms before planting.
Pre-Sprouting Corms Blog: Discover how to give your anemones a jumpstart for stronger growth.
Want a quick refresher on everything you need to know? Watch our Five-Minute Flower Friday Video on Anemones to get started!
We are looking forward to sharing more blooms with you soon.
Jessica & Graham

