
DIY Anemone & Ranunculus Corm Soaking System
If you’ve read our post on pre-soaking ranunculus and anemone corms, you already know that oxygenating the water makes all the difference for healthy root growth. Or maybe you’ve seen Graham’s DIY corm soaking system in action on our video and are ready to dive into the step-by-step details.
Not only is this system perfect for pre-soaking ranunculus and anemone corms, but it can also double as a compost tea brewing setup. With easy-to-find materials and a bit of effort, you’ll have a system that’s efficient, portable, and durable.
Let’s get started!
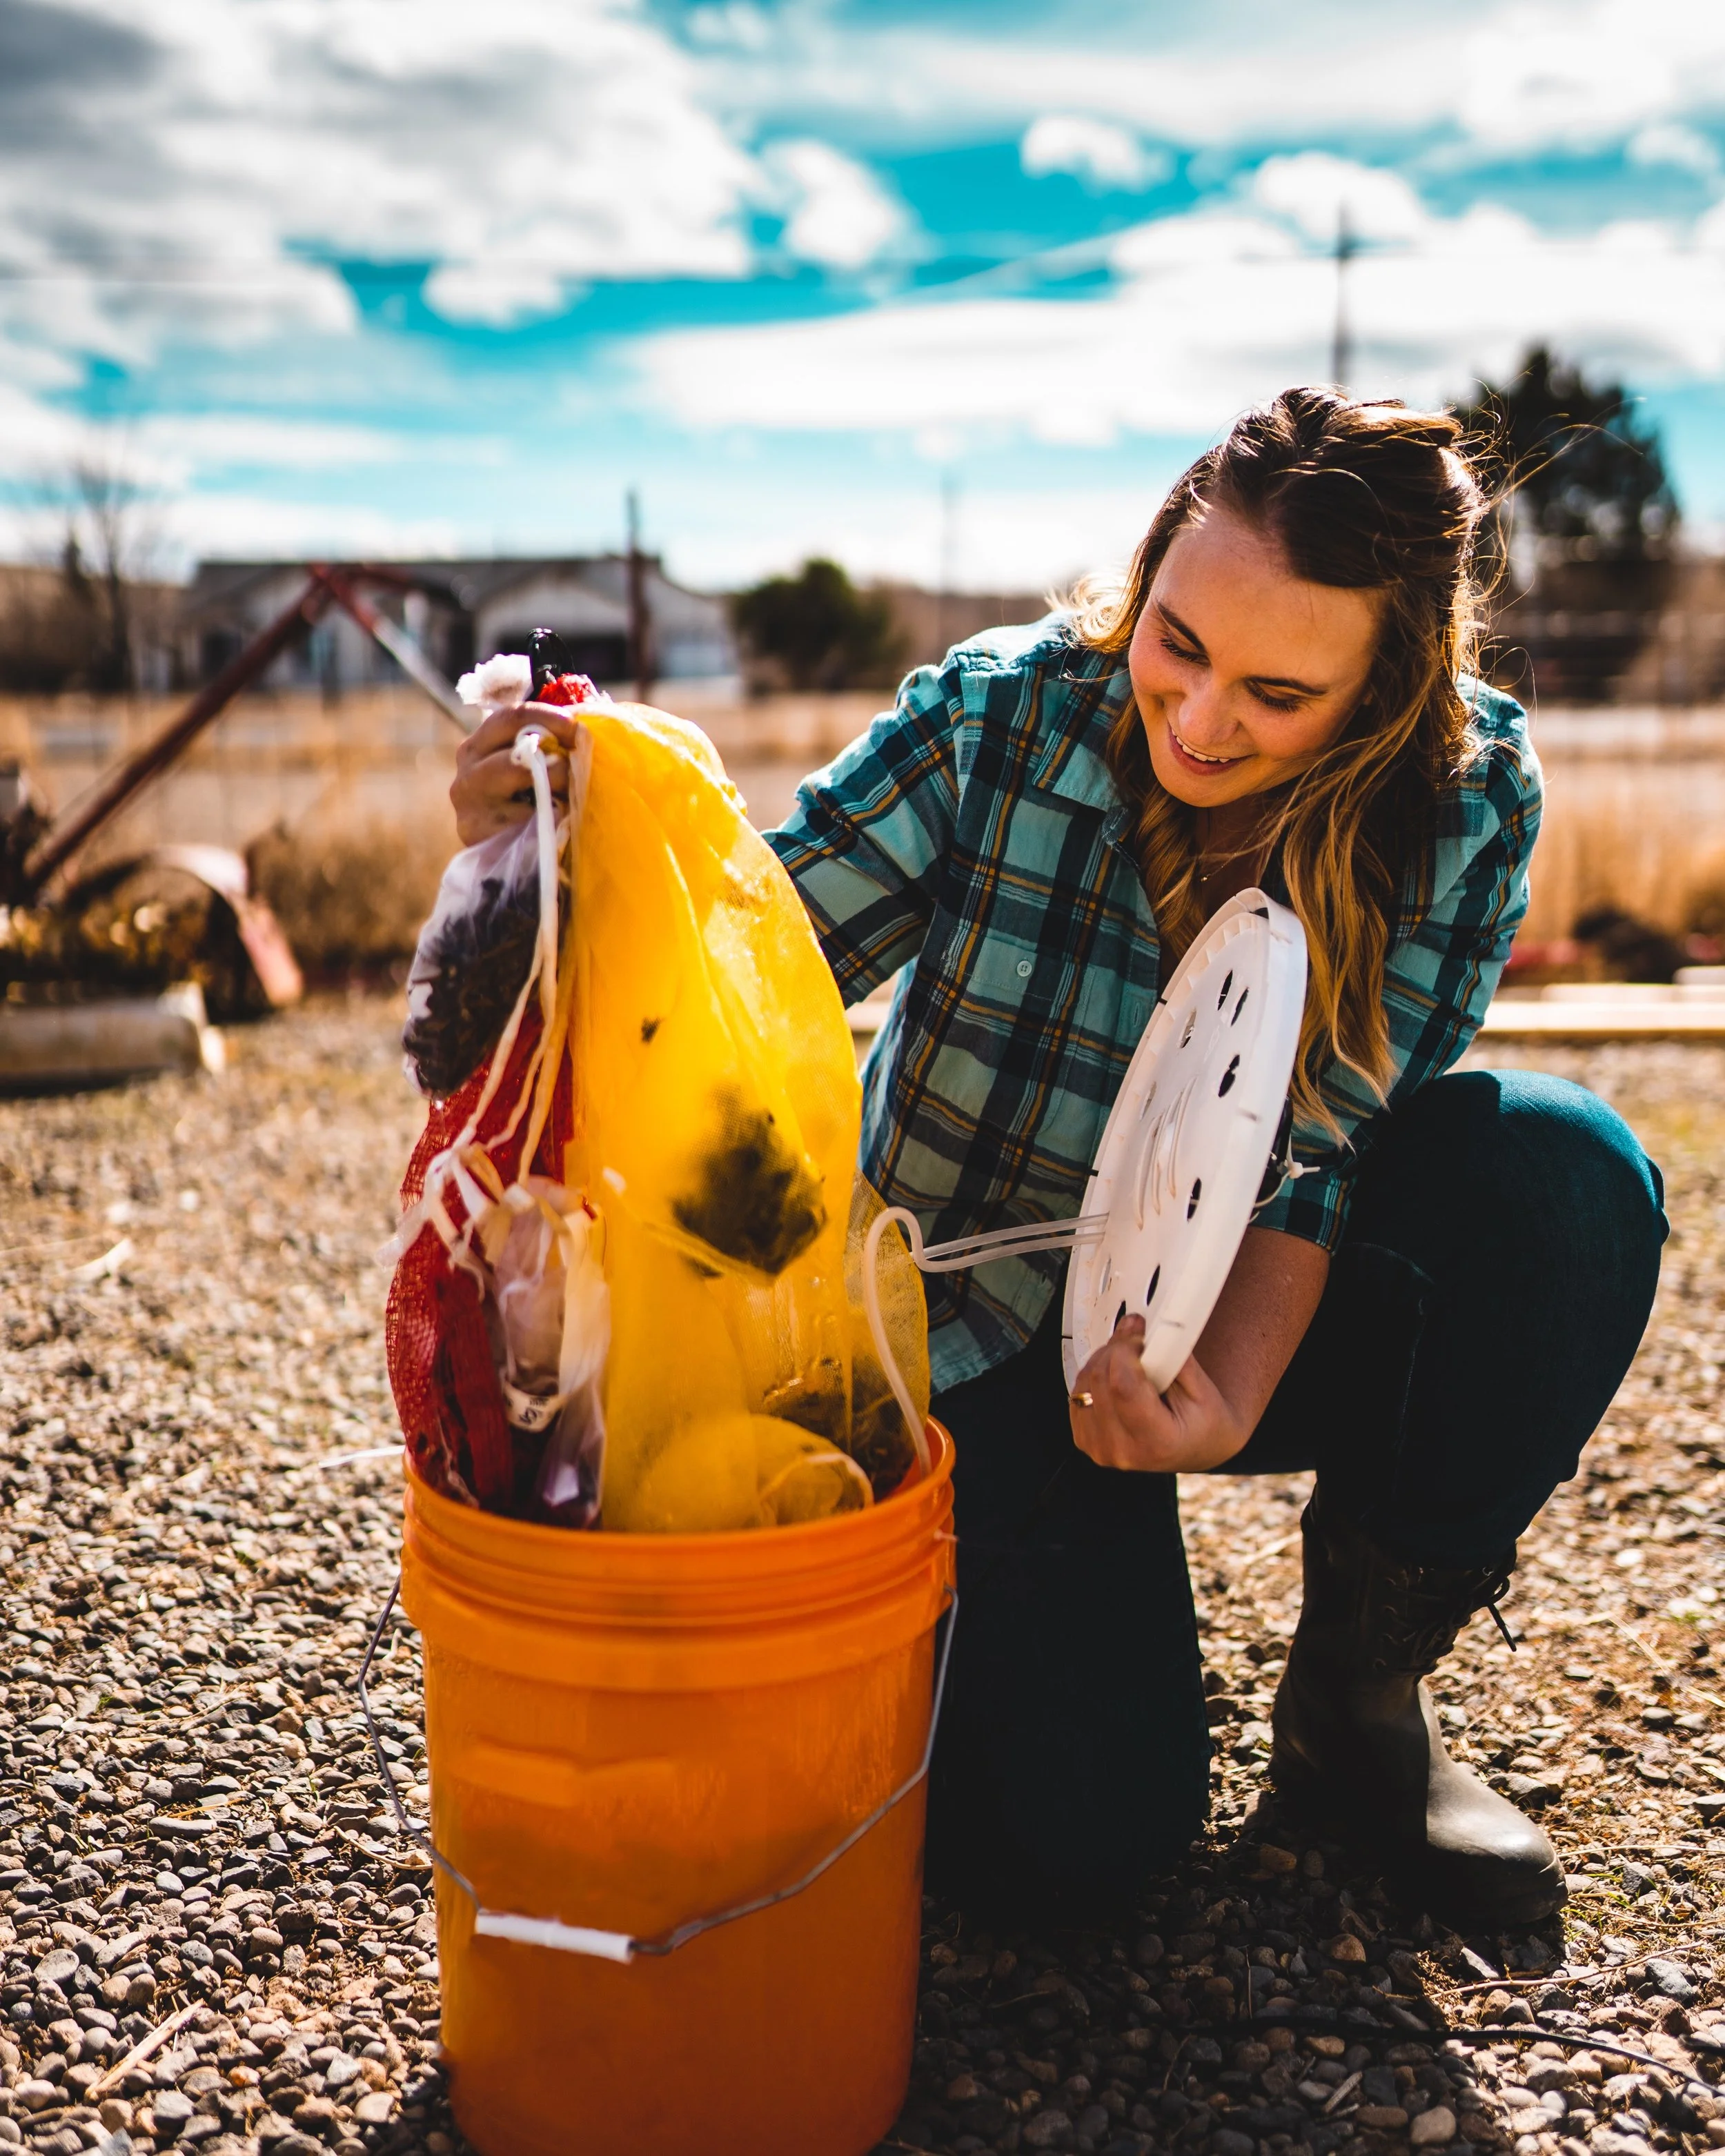
Prepping ranunculus and anemone corms with our DIY soaking system—an essential step for healthy blooms.
Tools and Supplies for the DIY Soaking System
Here’s what you’ll need to build your own soaking/compost tea system:
Aquarium pump kit with dual outlets (we’ve linked the one we used at the end of the post)
Sharpie
Five-gallon bucket
Lid for the five-gallon bucket
Drill
Standard drill bit
Spade (paddle) bit
Two to three 12-inch zip ties
Two 4-inch zip ties
Waterproof tape (we used electrical tape, but true waterproof tape is better)
Pro Tip: Make sure your bucket, lid, and drill bits are clean and sanitized before starting.
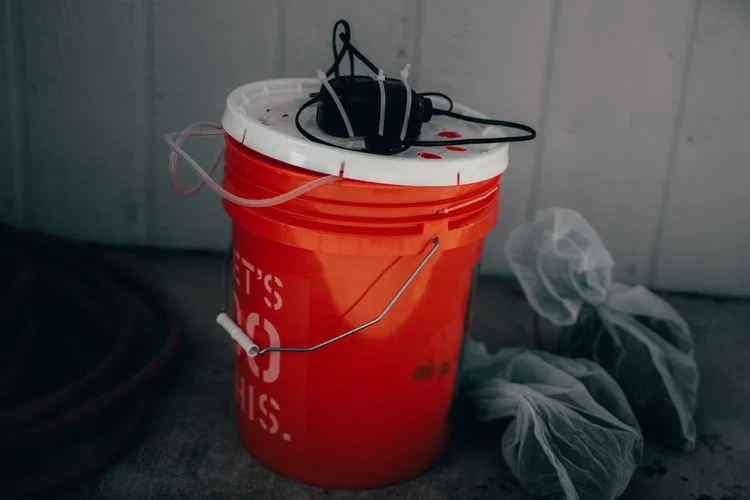
The finished DIY corm soaker setup, ready to help you kickstart your growing season.
How to Build Your DIY Soaking System


Step 1: Drill holes for the zip ties.
Place the aquarium pump in the center of the bucket lid.
Mark four drill spots near each end of the pump with a Sharpie.
Using a standard drill bit, drill holes about 3/8 inch in diameter.
For added stability, drill an extra set of holes for a zip tie across the center of the pump.


Step 2: Anchor the pump to the lid.
Feed the 12-inch zip ties through the holes and secure the pump tightly to the lid.

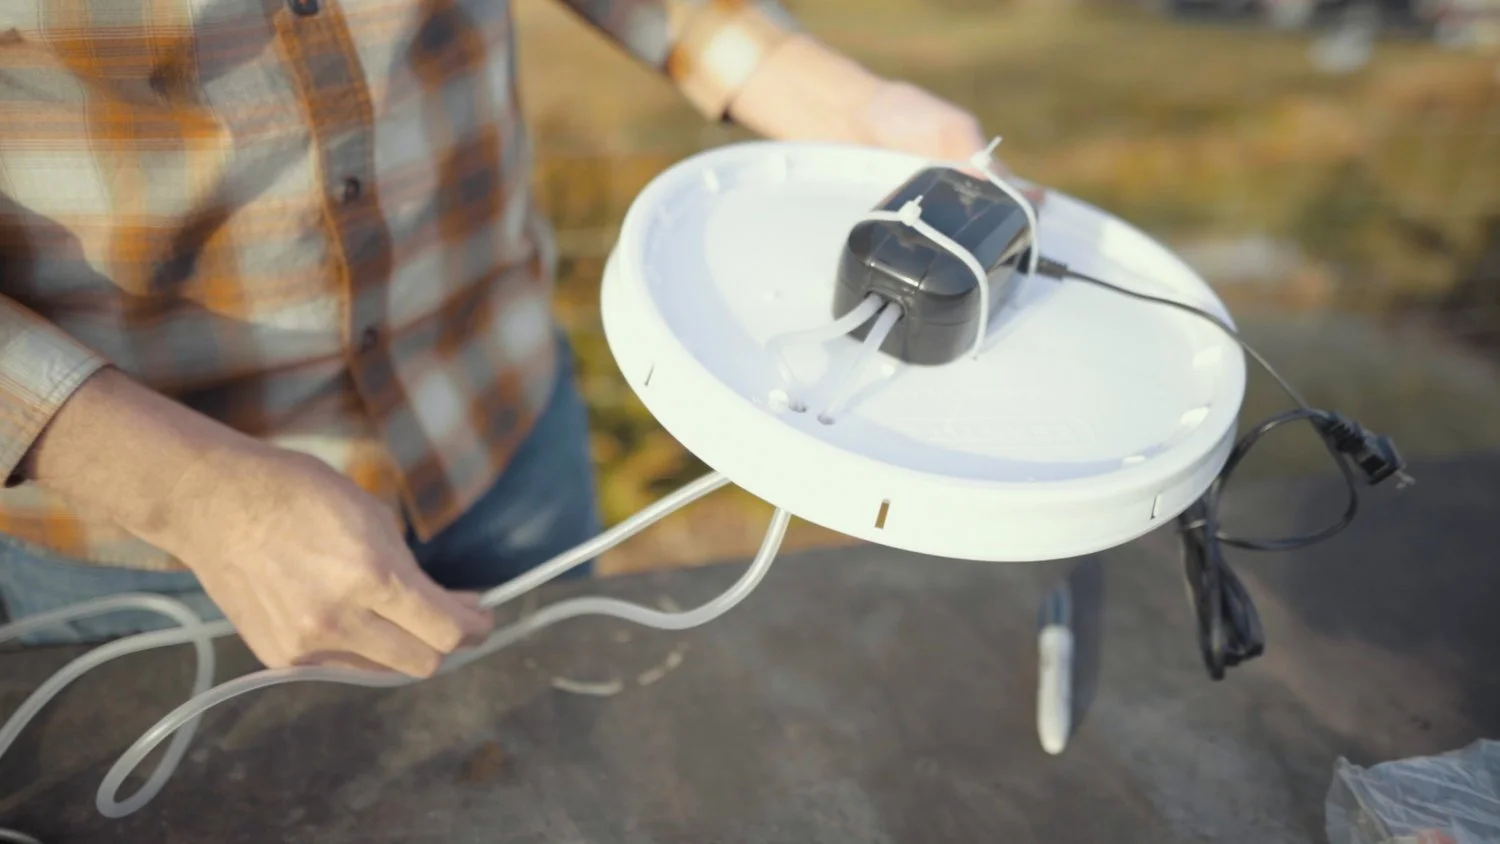
Step 3: Drill holes for the tubing.
Connect the tubing to the pump, then mark the lid where the tubing will feed through.
Drill 1/4-3/8 inch holes and thread the tubing through.

Step 4: Drill large air holes on the lid.
Using a spade bit, drill multiple holes around the pump to allow air to escape.
Avoid spade bits with screws, as they’re better suited for wood and can crack plastic.


Step 5: Drill holes on the bucket’s sides.
Drill four holes (two on each side) near the bucket’s top edge, large enough for the smaller zip ties.
Step 6: Tape down the tubing (optional).
Secure the tubing to the inside of the bucket with waterproof tape or zip ties.
Position tape or ties at the midpoint and bottom of each tube for stability.

Step 7: Test and use your system.
Fill the bucket with water and connect the pump to an outlet.
Place your corms or compost tea ingredients in the bucket and let the system do the work!

Safety Tips for Using the Soaking System
Keep the Pump Dry: Ensure the aquarium pump remains dry and elevated during operation to avoid electrical hazards.
Avoid Overfilling: Fill the bucket only to the level recommended for the pump to function safely and efficiently.
Secure Connections: Double-check that all tubing and zip ties are secure to prevent leaks or damage.
Use a GFCI Outlet: Plug the pump into a ground fault circuit interrupter (GFCI) outlet for added safety when working around water.
FAQ: Common Questions About the DIY Soaking System
Can I use the same system for soaking corms and brewing compost tea?
It’s not recommended. Residue from compost tea could contaminate the corms, leading to issues like rot or disease. It’s best to maintain separate systems for each purpose.
What size bucket is best for larger batches?
While this tutorial uses a five-gallon bucket, you can scale up to larger containers with higher-capacity aquarium pumps and longer tubing. Just ensure your pump can handle the increased water volume effectively.

A beautiful white ranunculus, thriving thanks to a strong start with proper corm soaking.
Final Thoughts on Your DIY Soaking System
Whether you’re preparing ranunculus and anemone corms for planting or experimenting with compost tea, this DIY soaking system is a simple and effective solution. It’s easy to build, reusable, and designed to last season after season.
Want to see the process in action? Watch Graham and I walk you through building and using the system in our video below. Your support means the world to us, so don’t forget to like, share, and subscribe!

We are looking forward to sharing more blooms with you soon.
Jessica & Graham