
The Great Dahlia Divide: A Grower’s Guide to Lifting, Dividing & Storing Tubers.
Dahlias are among the most stunning summer flowers, gracing gardens and flower fields with their vibrant colors from midseason through the first frost. As the days grow shorter and temperatures drop, preparing dahlia tubers for winter storage becomes essential for protecting them and ensuring a thriving performance next season.
At their peak, the dahlia patch is the most magical part of the garden, bursting with color as hot days transition into crisp autumn evenings. Yet, even in this enchanting moment, the cooling temperatures signal that it’s time to lift and store dahlia tubers before winter sets in.
From lifting to dividing, also referred to as splitting, dahlia tuber clumps, this process is part of the nearly year-round care that dahlias require. While it may seem daunting at first, I assure you it’s a rewarding experience—like opening gifts on Christmas morning, as each tuber is released from its clump. Not only does dividing dahlias allow you to increase your stock of favorite varieties, but it also gives you the joy of sharing them with fellow gardeners who dream of growing their own cut flowers.
In this guide, we’ll walk you through how to lift dahlia tubers, store them properly, and—when the time is right—divide them for next season’s blooms.
Note: This post contains affiliate links. If you make a purchase through these links, we may earn a small commission at no additional cost to you. Thank you for supporting our farm!
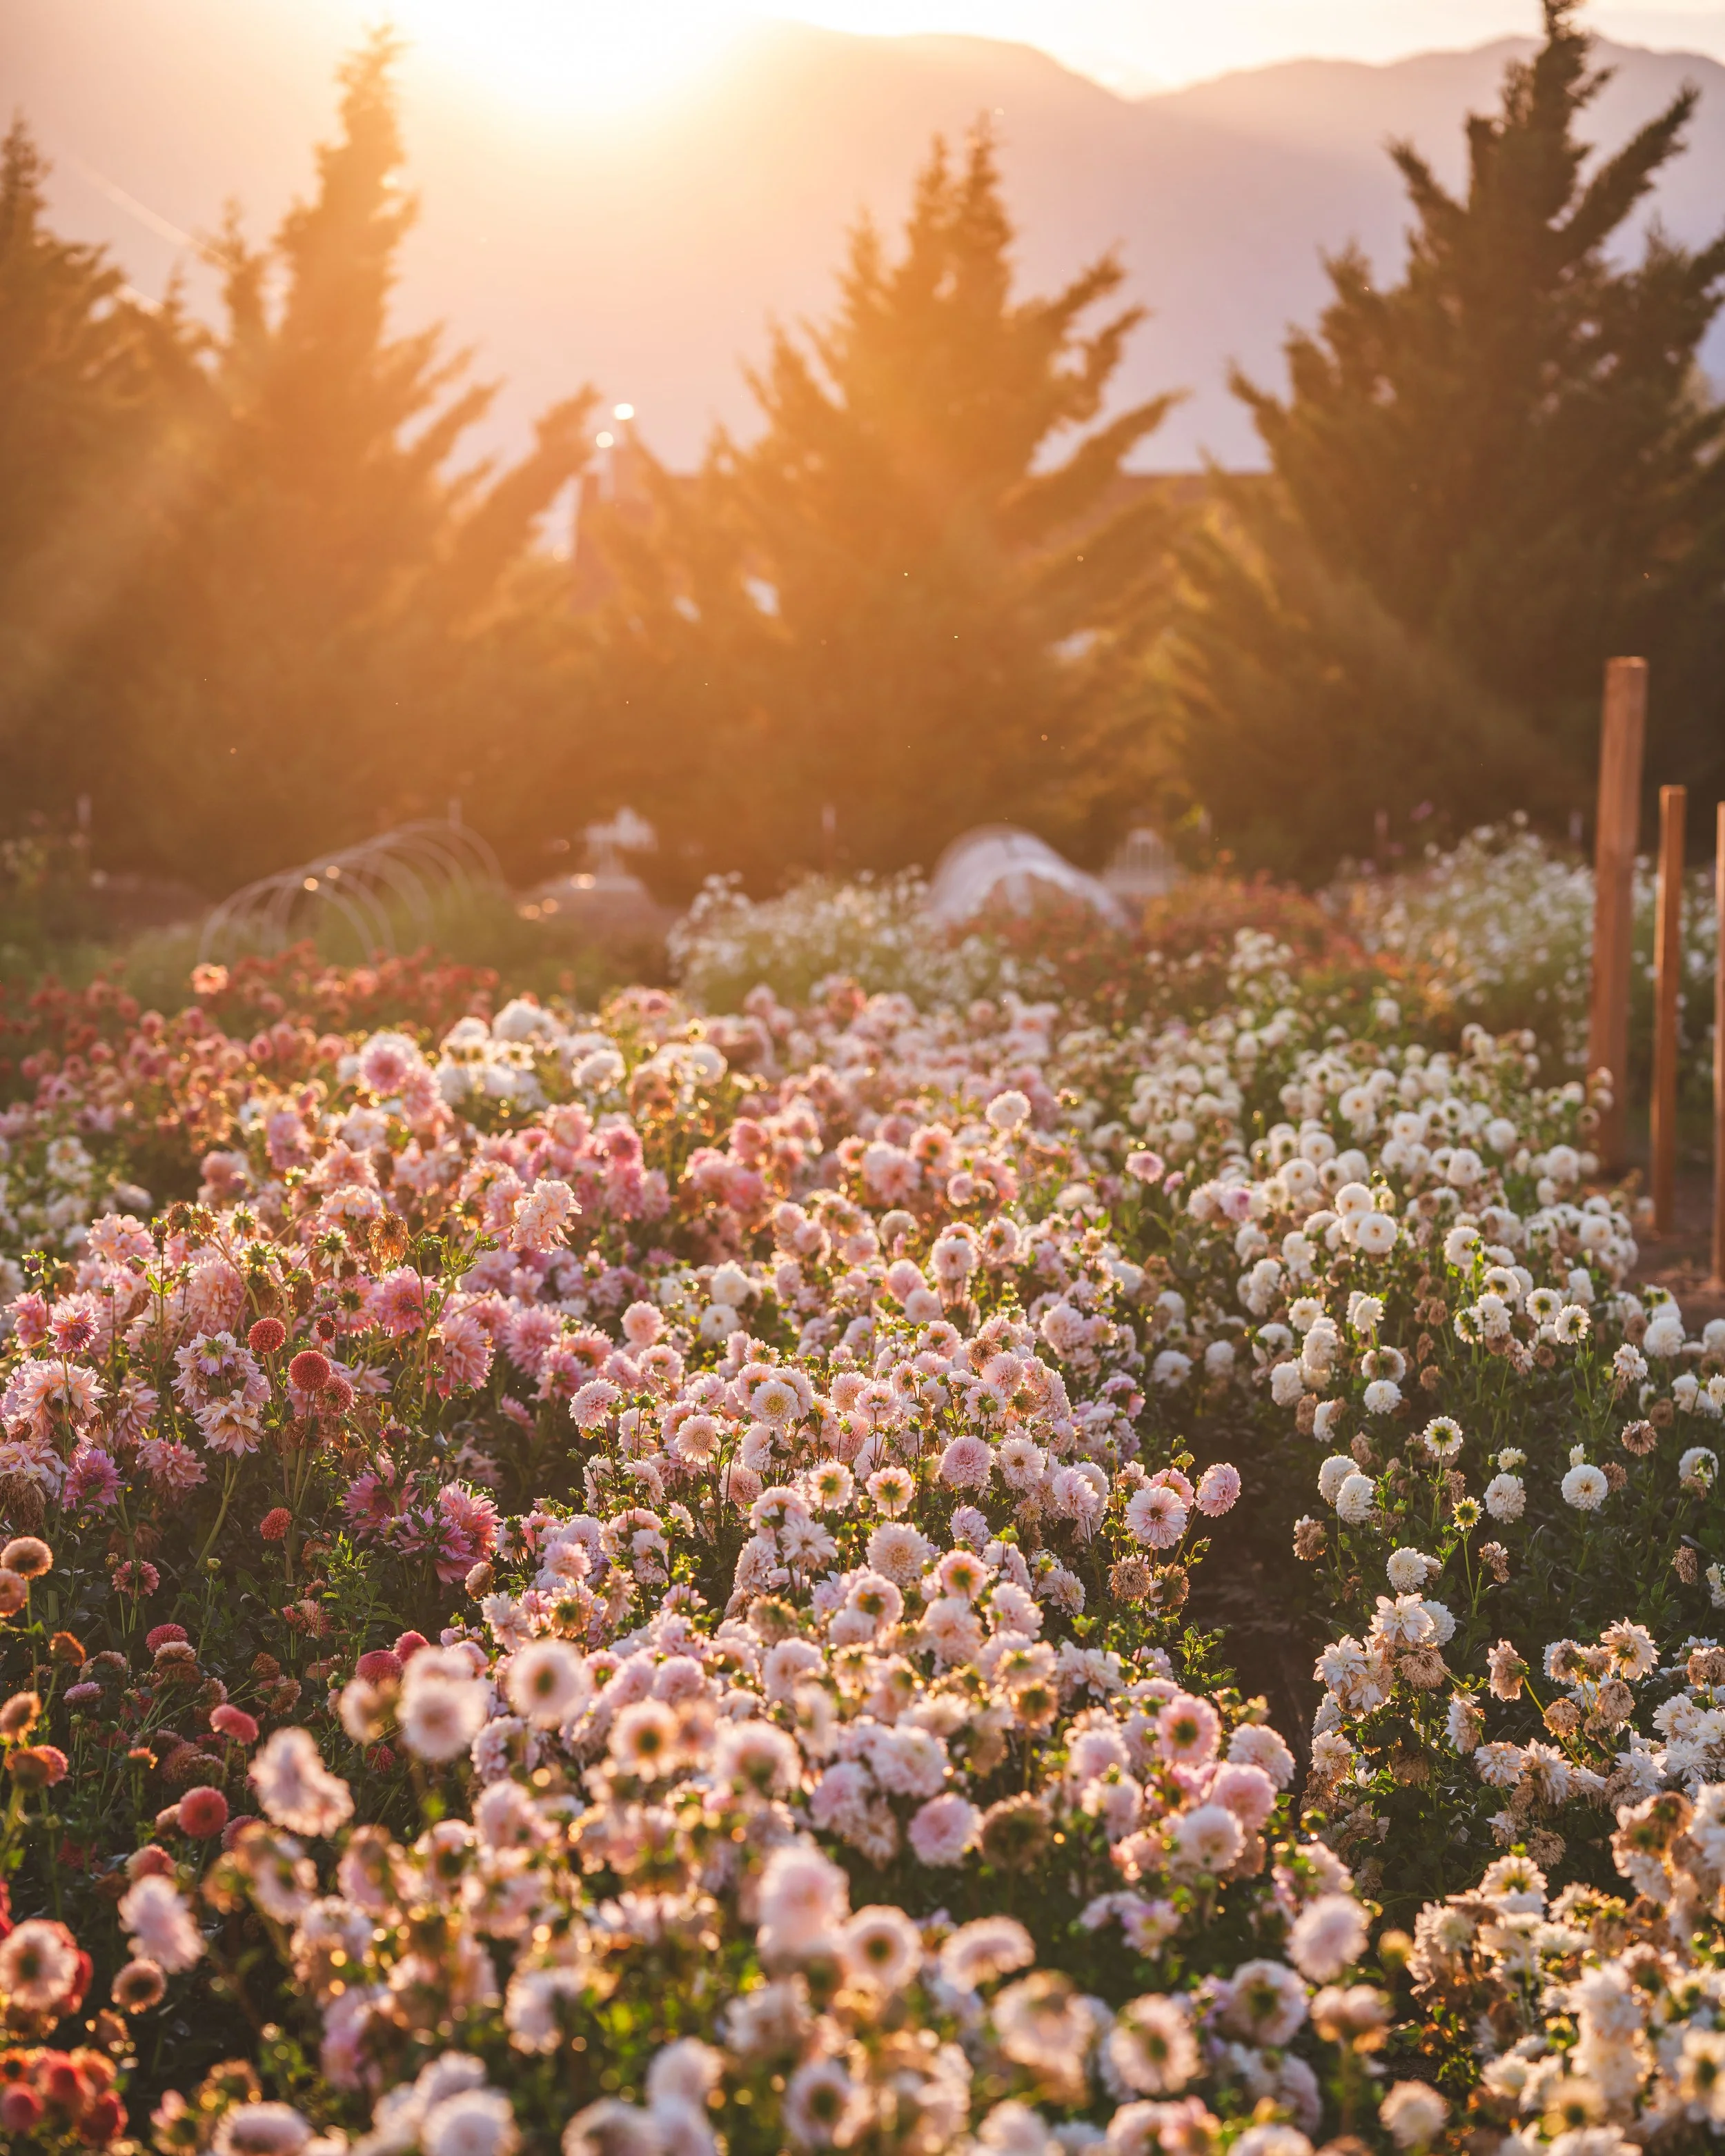
The dahlia patch was in peak bloom days before the kill frost greeted the field.
This guide is packed with everything you need to lift, store, and divide dahlia tubers! To make it easy, we've included quick navigation links so you can jump straight to the sections you need. Click on any title to go directly to that part, and if you’d like to return to the Table of Contents, just hit the back button.
We’re excited to share our best tips and tricks to help you keep your dahlias thriving—let’s dig in!
Table of Contents
Cold Protection: Why Lift Dahlia Tubers?
When & How to Lift Dahlia Tubers
Lifting & Cleaning Dahlia Clumps in the Field
Placing Clumps in Storage (Before Dividing)
Preparing Your Dahlia Dividing Workstation
Step-by-Step Process to Dividing Dahlia Tubers
Conclusion: The Labor of Love That Keeps on Blooming

Cold Protection: Why Lift Dahlia Tubers?
Dahlias are heat-loving plants, native to Mexico and parts of South America. In warmer climates (USDA Zones 9 and above), they can overwinter in the ground without the risk of cold damage. However, in colder climates (Zones 8 and below), their fibrous, water-filled tubers are highly sensitive to freezing temperatures.
When exposed to frost, the cells within the tubers rupture, leading to rot and tuber loss. The freeze-thaw cycle or excess moisture in winter can also cause decay, making lifting and storing a reliable way to protect them, when done correctly.
In our growing climate, we have experimented with overwintering dahlias in the ground. While we’ve had some success, we’ve also experienced failures. The overwintered plants tended to underperform, with sparse growth and delayed blooms, compared to freshly planted tubers, which quickly caught up and even bloomed ahead.
That said, some growers in Zones below 9 have reported success overwintering dahlias—especially when using techniques like deep mulching and planting in well-drained soil.

The one overachiever, a single Silver Years flower, survived the first hard frost of the season.
When & How to Lift Dahlia Tubers
When to Cut Back Dahlias
Dahlias should be lifted after a hard or killing frost at the end of the growing season. For those in frost-free climates, plants can be cut back when they naturally decline.
Signs that dahlias are ready to be cut back:
Weaker stems
Smaller flowers
Increased pest pressure
Best Practices for Cutting Back Dahlias:
When it comes time to cut back dahlia stalks, we’ve tried a variety of tools to get the job done—from pruner loppers to bypass loppers and even floral snips. Through trial and error, we’ve found the Japanese sickle to be the most efficient, though it is incredibly sharp, so handling it with care is essential.
In frost-prone areas— Cut back the stalks when you are ready to lift the tubers to prevent moisture from entering the hollow stems (which can lead to rot).
In frost-free areas— Cut plants back once they start looking tired.
Letting Tubers Cure in the Ground
After experiencing the stress of a killing frost or being cut back, tubers should be left in the ground for about two weeks to allow energy to fully transfer into the tubers.
However, in frost-prone climates, this is a balancing act. If deep freezes are in the forecast and risk freezing the soil, it’s best to lift tubers as soon as possible.
In milder climates, waiting two weeks before lifting can help strengthen tubers for storage.
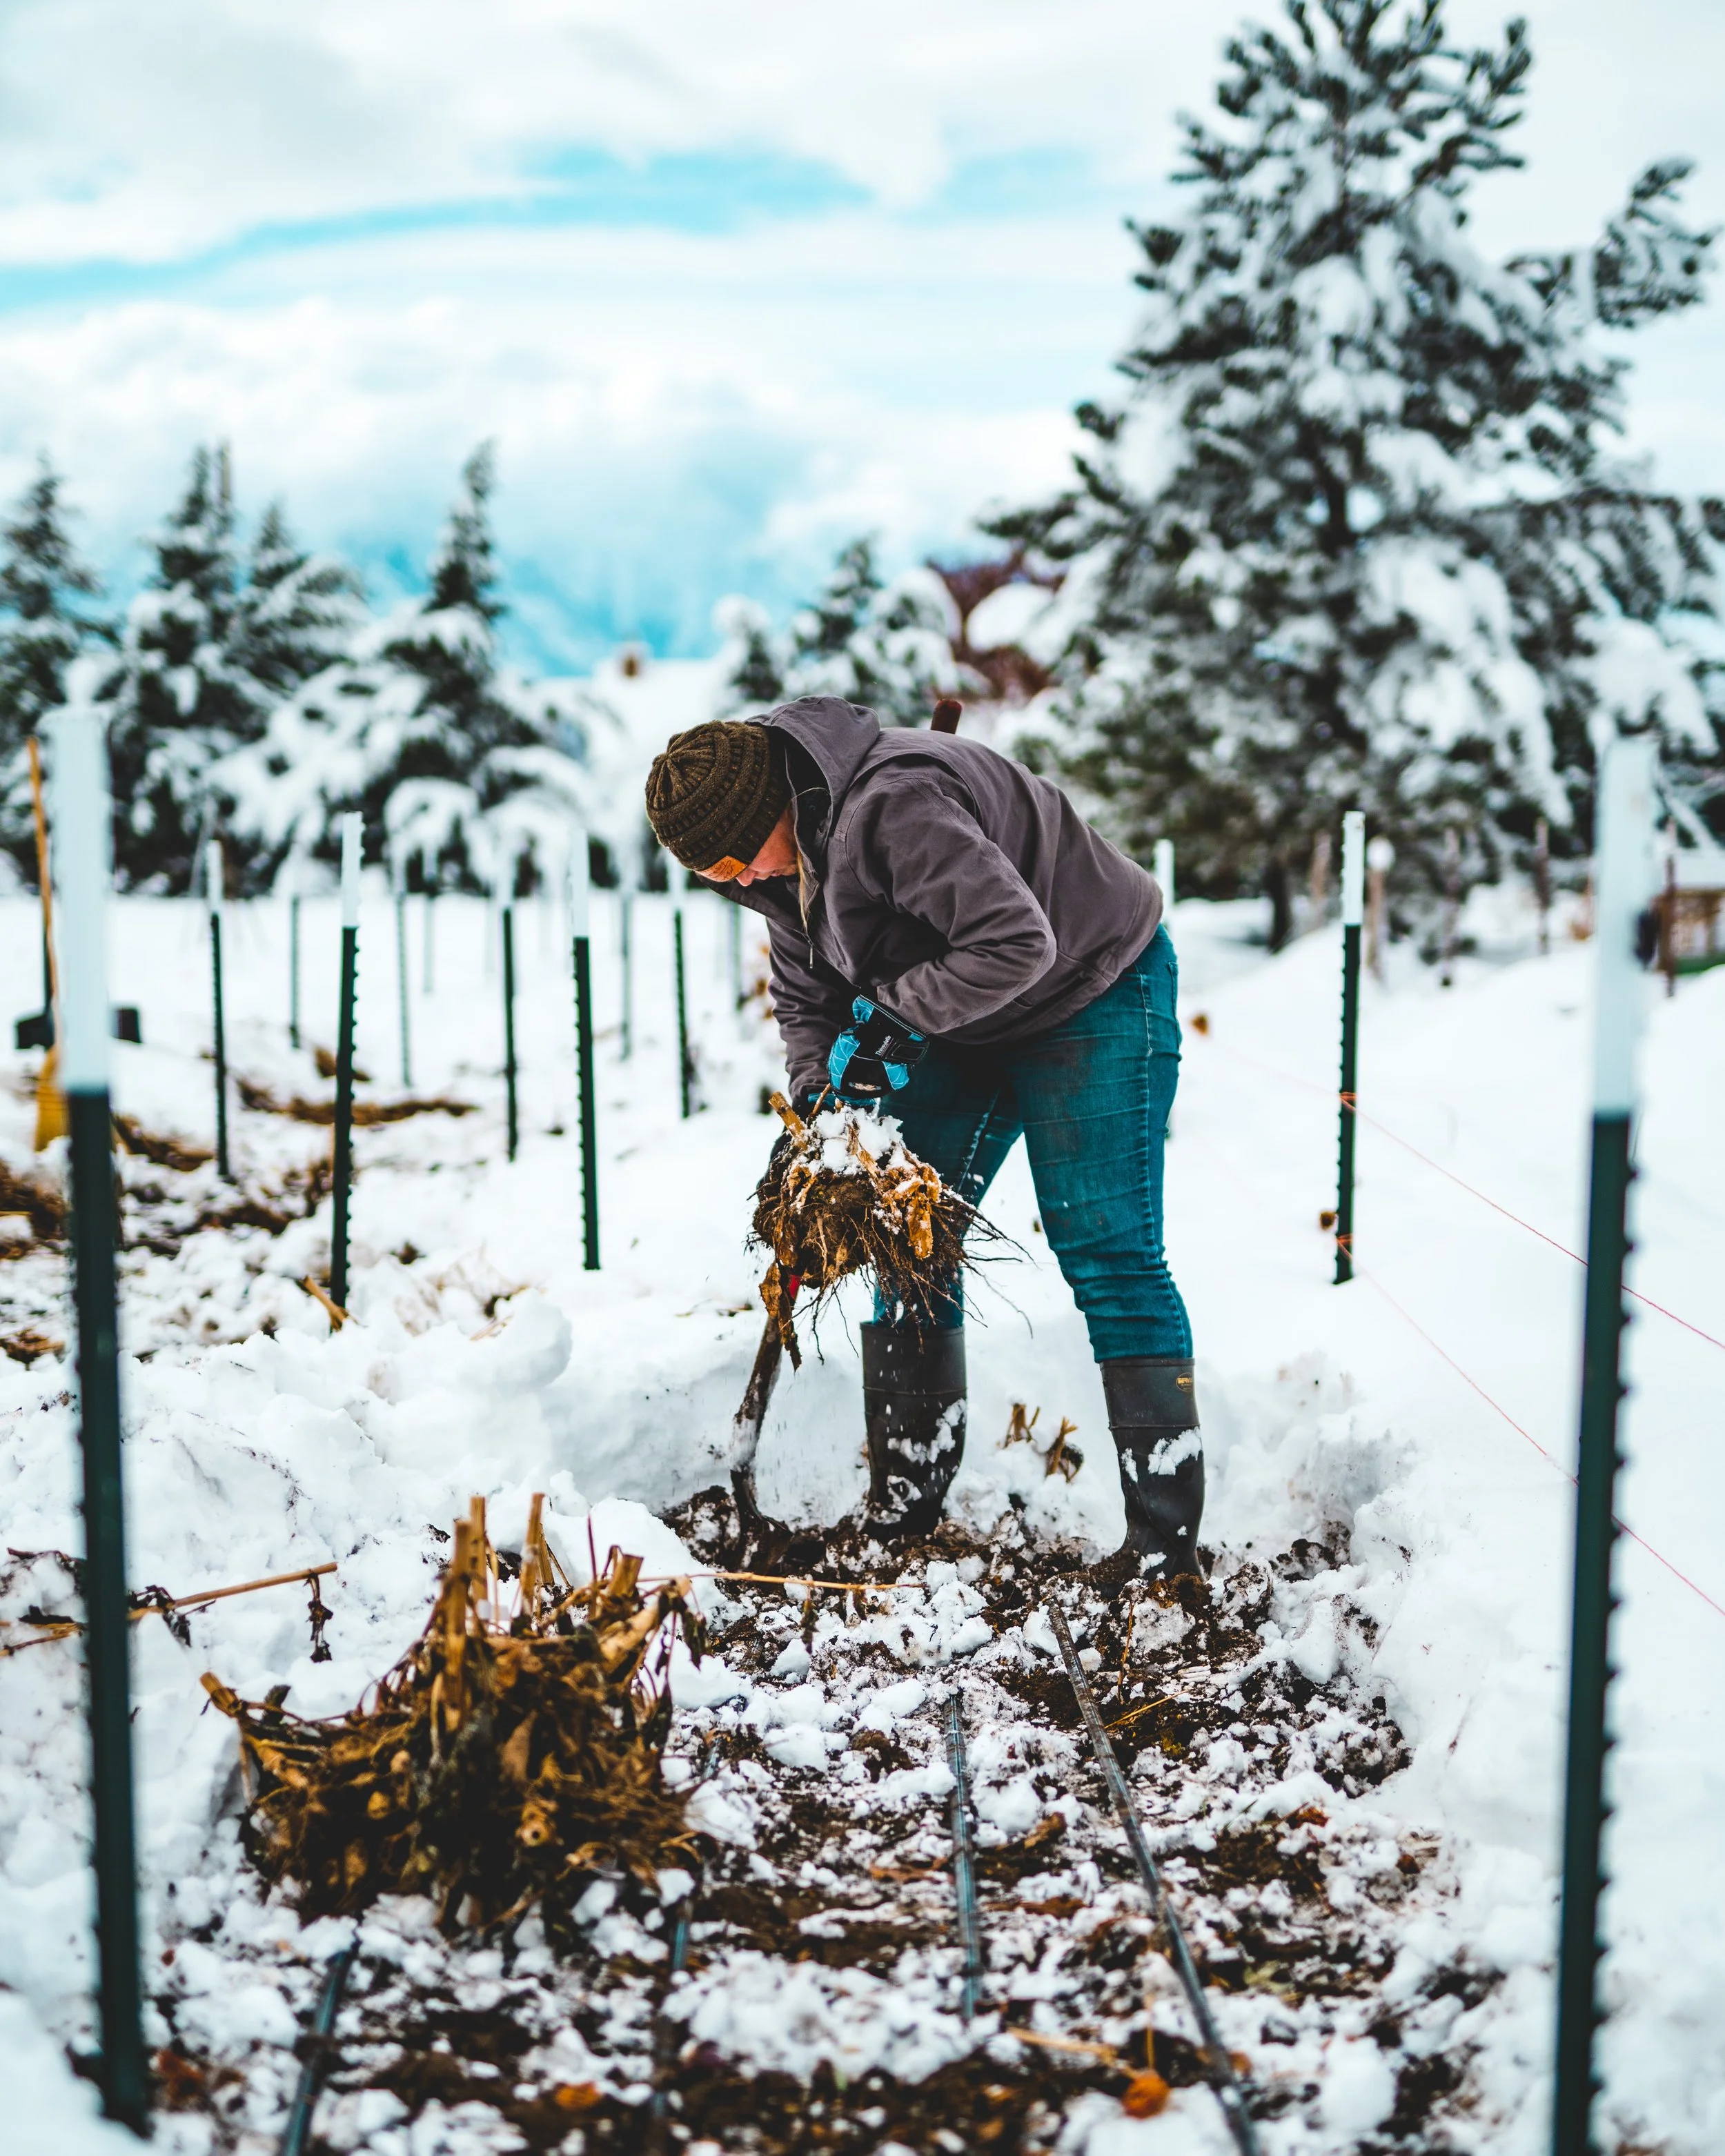
After many seasons, we’ve learned to prepare for unexpected snow before getting all the dahlia clumps out. These days, we move quicker to beat the unpredictable fall weather of our region.
Lifting & Cleaning Dahlia Clumps in the Field
When lifting dahlia tubers, the key is to minimize damage—try to avoid breaking, stabbing, or slicing them. Dahlia tubers often grow in a shape I think of as an octopus or a giant ranunculus corm, with tubers spreading out in all directions.
We prefer using a spade shovel to carefully go around the plant, gently lifting from underneath the clump. Some growers prefer a pitchfork, which works too!
Once lifted, we do some minor cleanup in the field to remove excess debris and prepare tubers for storage:
Tools: We keep a cart with pruners and garden shears soaking in a diluted bleach solution (1 part bleach to 10 parts water) to sanitize between clumps.
Excess Cleanup: Remove excess stems, roots, or any broken tubers.
Soil Removal: We use screwdrivers and paintbrushes to gently remove as much soil and mud from the clumps as possible.
Pro-Tip: After lifting, leave enough of the stalk as a handle before cutting it down. Use a wooden stake to gently whack the stem, helping to dislodge excess soil from the dahlia clump before fine-tuning with brushes and screwdrivers. Use caution—some tubers may be damaged with this method—but it’s especially effective for cleaning large clumps.
Want a glimpse into our cutting back and lifting process? Check out our reel here for a beautiful behind-the-scenes look at how we do it!
Why We Don’t Rinse Tubers at This Stage
Although it might seem logical to rinse tubers immediately, we’ve found that freshly dug dahlia tubers have delicate, fragile skins, and rinsing can make them more prone to damage, rot, or disease. Additionally, during this time of year, we’re often racing against Jack Frost, leaving little room for extra steps like washing and ensuring tubers dry properly before storage.
By skipping the rinsing step, we not only save time but also reduce the risk of introducing excess moisture, which can lead to rot during storage. Instead, we allow the soil to remain on the tubers as a protective barrier during the curing and storage phases.

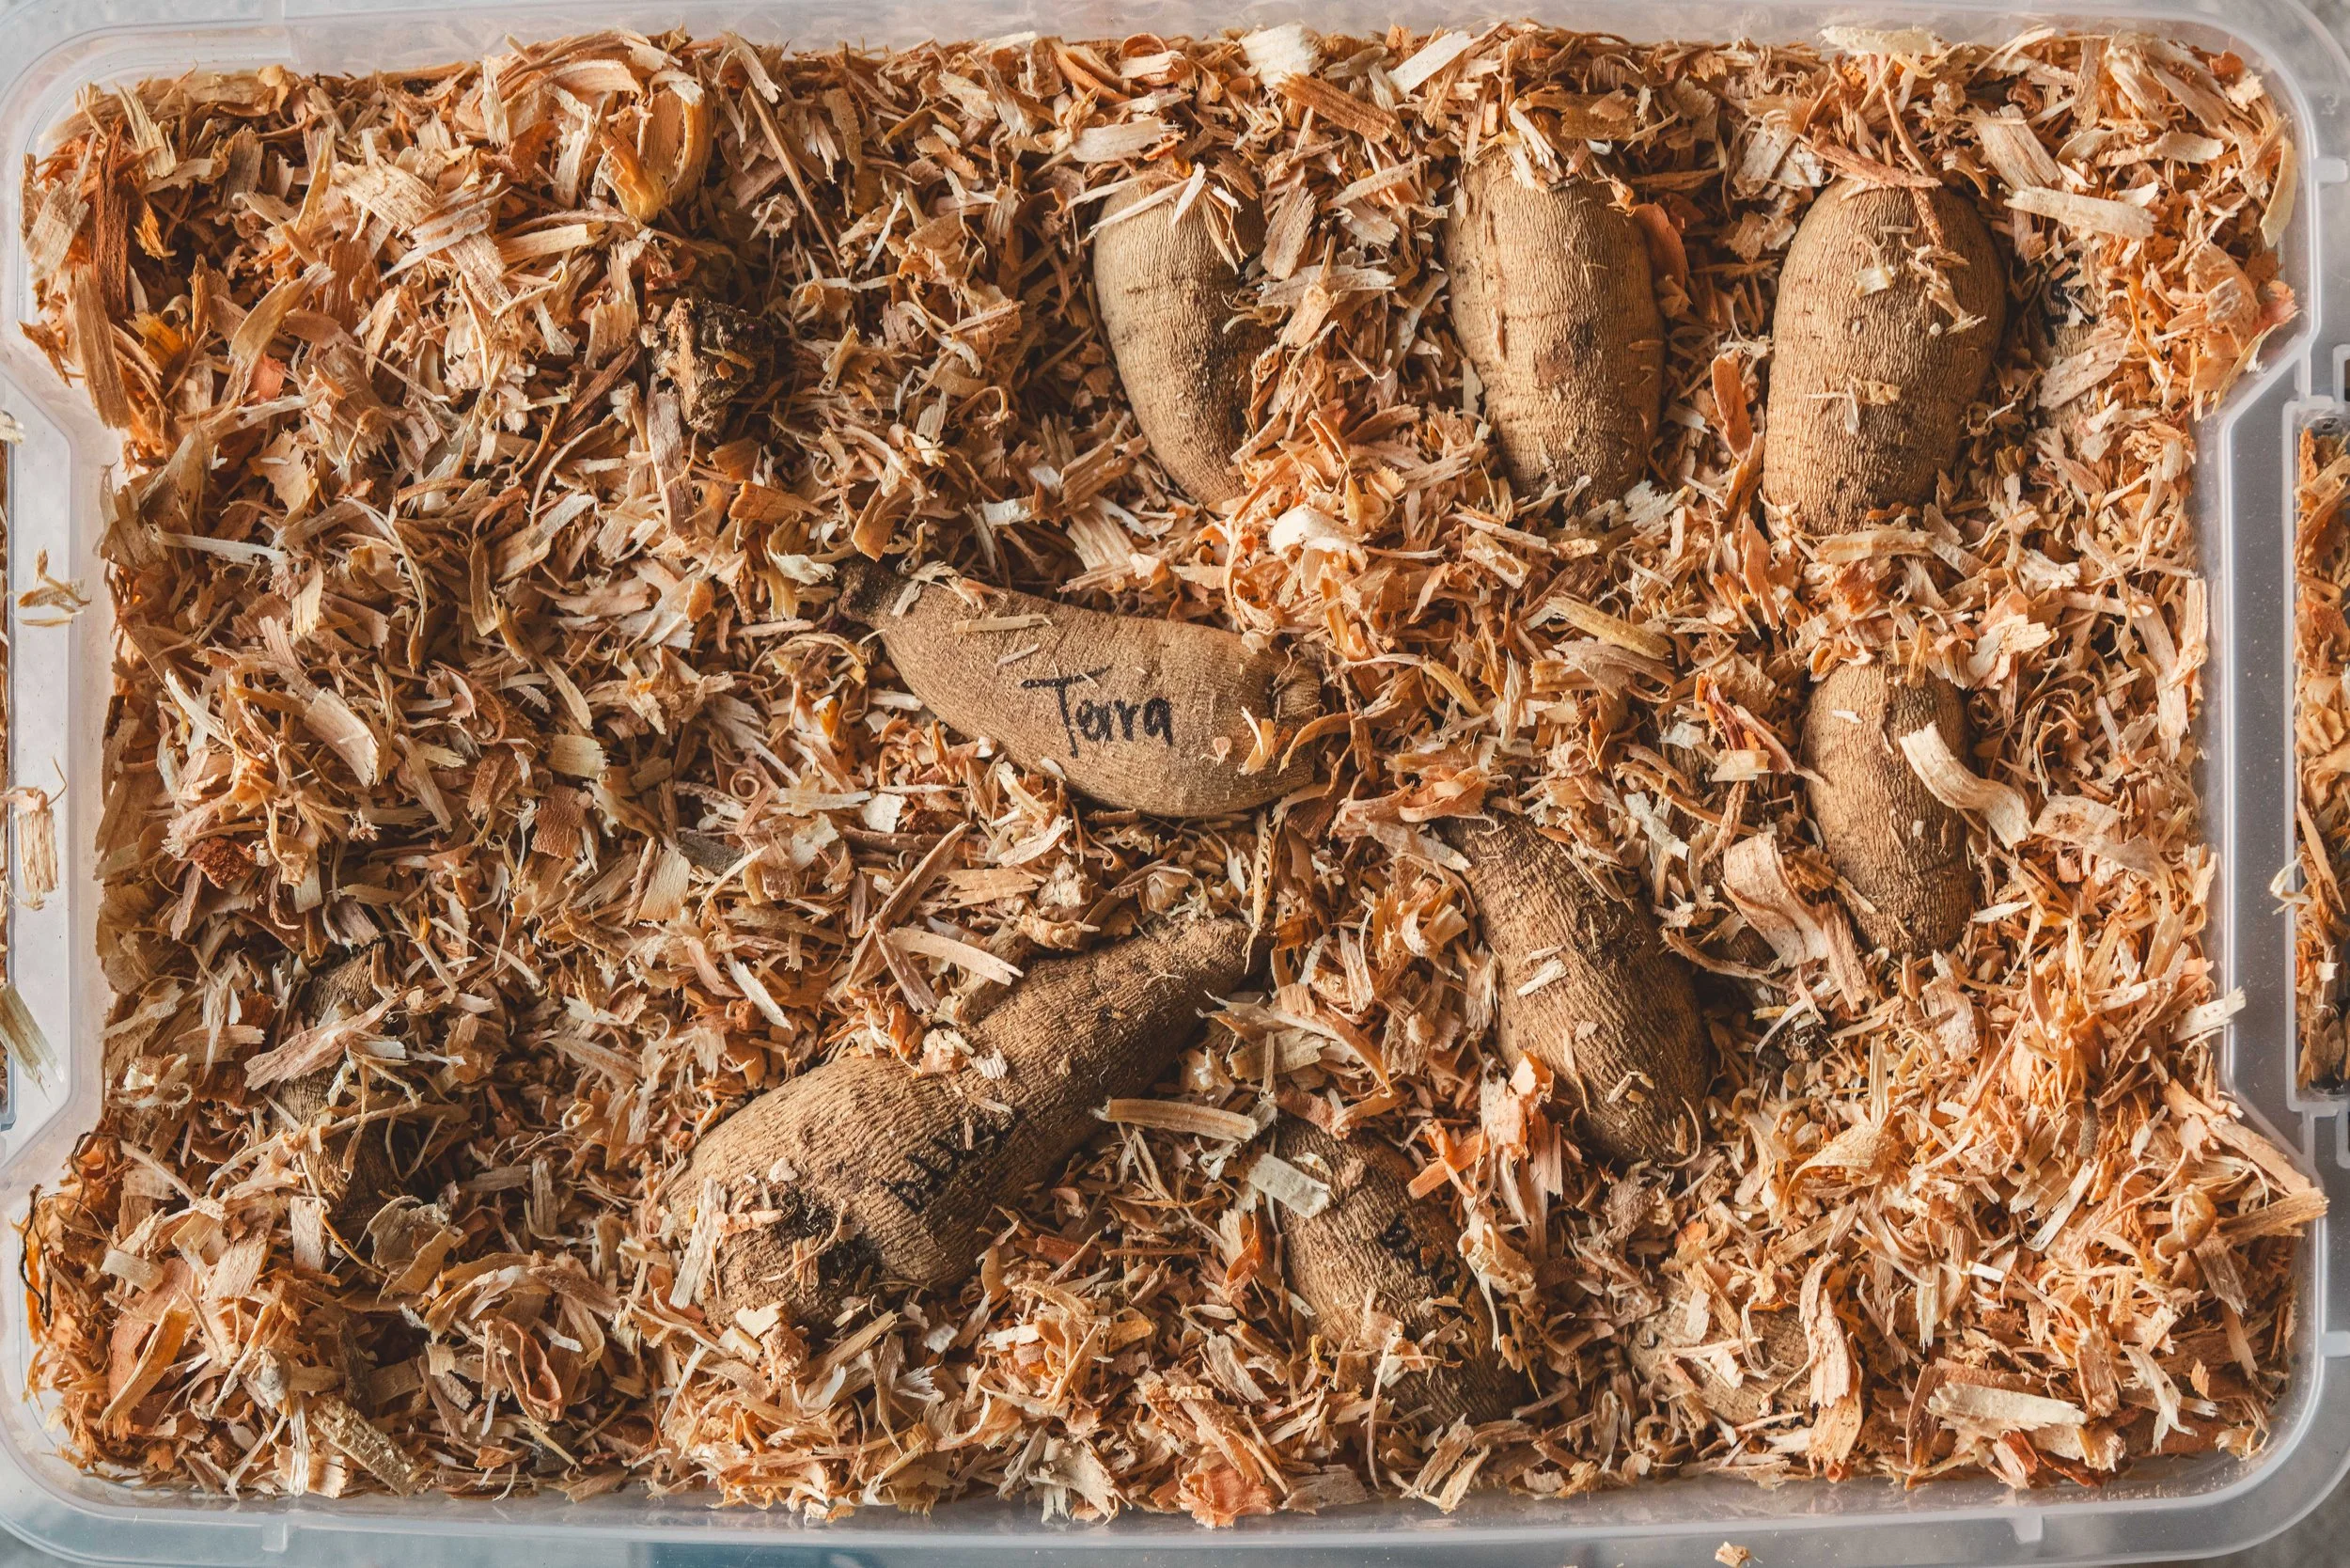
Dahlia clumps packed up in totes with pine shavings—ready for storage! Bird netting is a great way to separate multiple varieties in one tote. I always think the clumps look like giant ranunculus corms!
Placing Clumps in Storage (Before Dividing)
At this stage, we store the whole clumps in totes with pine shavings. Dahlias need 70–80% humidity to keep from drying out, and the pine shavings help maintain this environment.
Since we don’t have a climate-controlled space like a root cellar or walk-in cooler, we store the totes in our garage, which provides relatively stable conditions.
Labeling & Organization:
Flagging tape is tied to the outside of each tote for easy identification.
Labels are placed with each variety inside the tote for redundancy; for ease, we also use flagging tape.
If multiple varieties are stored together, we divide them using bird netting.
(We’ve tried paper and burlap dividers in the past, but they were prone to breakdown and mold.)
Curing Dahlia Tubers in Storage
Dahlia tubers go through an additional curing process once in storage. Depending on their moisture content at lifting, they may soften slightly during the first week or two.
This can be alarming at first, but don’t worry—over time, they equalize and firm up again.
We check tubers periodically during this initial phase to ensure they are maintaining adequate humidity and aren’t drying out excessively or are building up too much moisture, which can lead to rotting.

Why Divide Dahlias?
Increase Dahlia Stock
A single dahlia tuber planted in late spring or early summer can multiply significantly in just one growing season.
On average, a single dahlia tuber can produce 3–7 viable tubers (tubers that are intact and have visible eyes), though some varieties may produce fewer, while others may yield more depending on growing conditions and plant vigor. For example, the Cornel varieties (Cornel, Cornel Bronze, and Ivanetti) are heavy producers, often yielding ten or more viable tubers, whereas American Dawn tends to produce significantly fewer in comparison.
Dividing tubers allows you to increase your stock, share varieties with others, or propagate through cuttings.
Dividing Dahlias Saves Storage Space
Dividing dahlia clumps into smaller sections or individual tubers allows for more efficient storage, taking up significantly less space.
Properly divided and labeled tubers can be neatly packed into containers or crates, making organization easier, especially when it comes time for crop planning, planting, or sharing excess tubers.
Additionally, smaller, well-divided tubers are less likely to rot since large clumps can trap moisture, increasing the risk of decay.

A dahlia clump ready to be split!
When to Divide Dahlia Clumps
Deciding when to divide dahlia clumps is a personal choice for each grower—there is no single "right" or "wrong" time as long as the clumps have been stored properly. That said, if you have the ability to wait a few weeks after lifting, allowing tubers to cure in storage can help increase their survivability during long-term storage.
Commonly, tackling what we lovingly refer to as the “Great Dahlia Divide” depends on infrastructure, climate, and personal schedules.
For us, fall is packed with farm chores, quickly followed by holiday offerings, and somewhere in there, we carve out much-needed time with loved ones. Because of this, we often begin dividing in winter. However, winter division can be trickier, as tubers are fully dormant and eyes, which are the growth nodes plants come from, can be harder to identify. With years of experience and thousands of clumps divided, we’ve developed the skill to confidently select viable tubers even in deep dormancy.
For those just starting out, dividing in spring, when tubers begin breaking dormancy, may be more ideal, as eyes are much easier to identify.
Choosing the Right Time to Divide
Each grower approaches dahlia division differently, depending on storage setup, climate, and personal preference. Some prefer to divide immediately after lifting in fall, while others wait until mid-winter or early spring. Each approach has its benefits and challenges.
| Timing | Pros | Cons |
|---|---|---|
| Fall (Right After Lifting) | Eyes are easier to identify, no need to store whole clumps, get it done before busy winter | Tubers are still curing, risk of damage while fresh, time-consuming during an already busy season |
| Winter (Mid-Storage) | Spreads out the workload, allows tubers to cure before handling, easier to plan for spring | Eyes may be harder to see if fully dormant, requires experience to divide successfully |
| Spring (Before Planting) | Easier for beginners to see eyes, no risk of misidentifying viable tubers | Storing whole clumps for months takes up space, increased risk of rot or shriveling if not stored properly |
Storage Considerations & When You Need to Divide
If tubers are stored properly, there’s no rush—dahlia clumps can remain whole until just before planting. Some growers prefer to wait until spring to divide, ensuring tubers stay intact longer, which helps prevent excessive moisture loss.
However, in colder climates where storage conditions aren’t climate-controlled (such as in garages or sheds), waiting too long may increase the risk of shriveling or rot.
As long as tubers are firm, healthy, and not drying out, you can divide them whenever it fits your workflow best.
When to divide dahlia clumps depends on your schedule, storage setup, and climate. As long as tubers are stored properly, division can happen in fall, winter, or early spring—whenever works best for your process. If you’re new to dividing, waiting until spring when eyes are more visible can make the process easier.

Preparing Your Dahlia Dividing Workstation
Dividing dahlias is a labor of love, and having the right tools makes a huge difference, ensuring your efforts pay off with healthy, viable tubers.
Essential Tools & Supplies
Pruning Shears – For cutting small roots and finer work
Bypass Pruners – To remove tougher stalks and thick roots
Small, Sharp Floral Knife – Ideal for precise cuts when separating tubers
Work Surface – A stable, clean area for working
Containers for Sanitizing – One for tools and one for tubers
Hose with Nozzle – For rinsing soil off tubers before dividing
Mesh Trays, Bulb Crates, or Drying Racks – For air-drying divided tubers
Good Lighting – Essential for spotting viable eyes
Gloves – For protection when handling tubers, we use switch between cold wash station gloves and industrial disposable ones.
Rubber Apron and Waterproof Shoes (Optional) - To protect clothing and comfort.
Bleach (or Preferred Sanitizer) – For sanitizing tools and preventing disease
Water – Cold or lukewarm, but not hot, for rinsing tubers
Flagging Tape - For labeling tubers for drying and storing
Sharpie - To write on flagging tape and (optional) to label for redundancy on dried tubers

Our Dahlia Dividing Setup
Over the years, we’ve fine-tuned our dahlia dividing setup to make the process more efficient, comfortable, and organized. In the early years, we worked outdoors, but as cold weather set in, it became unsafe and inefficient. We then moved the operation indoors to the kitchen counter, only to find ourselves overrun by dahlia tubers in our small space. That’s when we knew we needed a dedicated dahlia workstation.
The ideal dahlia workstation had to:
Provide a rinse station for cleaning dahlia clumps
Contain water and mud to minimize mess
Offer good lighting for spotting viable eyes
Be sturdy and tall enough for comfortable dividing
Have an accessible drainage system

What We Built
To meet these needs, we built a wooden frame that holds a galvanized tank with drains. The workstation includes:
A wire mesh top on hinges that allows easy lifting to drain the tank as needed
A hose outlet at the bottom to release water easily
A washdown gun popular for market growers to wash root crops with a lightweight hose, mounted at the workstation and connected to our water tank in the garage. This nozzle provides a gentle rinse that protects the tubers’ skin, unlike standard nozzles that can strip their natural protective layer.
A hook to hold the hose nozzle between uses
A plastic backsplash to prevent overspray and redirect excess water back into the tank
Overhead lighting to ensure we can see viable eyes clearly
A wooden cutting board top that provides a stable work surface without straining the mesh
With a couple of space heaters and a fatigue mat, we can divide dahlias comfortably for hours, even during the coldest winter days.
Our Lean Workflow
This system keeps our workflow efficient:
Dahlia clumps waiting to be divided are stored nearby.
They are moved to the workstation, which doubles as a washing and dividing station.
Individual tubers dry on racks set up near the workstation.
Once dried, individual tubers are brought to the workstation for labeling, tallying, and repackaging before final storage in smaller containers.
Not only is having an appropriate space to work in essential, but also steps to keep our dahlia stock healthy.

Sanitation for the Win
Dahlias are susceptible to several diseases, many of which can be prevented with proper sanitation practices. We start our sanitation procedures in the field at lifting and continue them through the dividing process to reduce the risk of spreading disease.
Common Dahlia Diseases That Spread Easily
Bacterial & Fungal Rot
Crown Gall (Agrobacterium tumefaciens) – Causes swollen, rough, tumor-like growths on tubers.
Bacterial Soft Rot (Pectobacterium spp.) – Leads to mushy, foul-smelling tubers that collapse.
Fusarium Wilt (Fusarium oxysporum) – Causes internal brown streaking and tuber rot.
Botrytis Blight (Botrytis cinerea) – Can cause gray mold and rot in humid storage.
Sclerotinia Rot (Sclerotinia sclerotiorum / White Mold) – Produces dry, cottony mold and hard, black sclerotia inside tubers.
Viral Diseases
Dahlia Mosaic Virus (DMV) – Can be present in tubers, leading to mottled or distorted growth.
Tobacco Streak Virus (TSV) – Weakens plants and reduces flower production.
Impatiens Necrotic Spot Virus (INSV) – Causes stunted growth and necrotic, deformed leaves.
Nematodes
Root-Knot Nematodes (Meloidogyne spp.) – Cause swollen, knotted tubers and poor plant growth.
Why Sanitation is Critical
Each of these diseases is a serious concern for dahlia growers. While some diseases cannot be cured, proper sanitation can contain them and prevent their spread.
The simplest step? Sanitizing cutting tools between each clump when dividing dahlias.

Choosing a Sanitization Solution for Your Dahlia Division
At Sierra Flower Farm, we use a diluted bleach solution because it is inexpensive, easy to purchase, widely used by experienced dahlia growers, and provides strong sanitation for both cutting tools and divided tubers.
Dahlia dividing is a fast-paced process, and we need a sanitizing solution that can keep up with us.
Sanitizing Safety Tips
Always wear gloves, skin protection, and eye protection.
Follow the manufacturer’s labels for dilution and handling.
Refresh the solution frequently to maintain its effectiveness.
Next Step: Choosing Your Preferred Sanitization Method
Below is a comparison table of different dahlia tuber sanitation options, including bleach, hydrogen peroxide, and Physan 20.
| Method | Dilution Ratio | Soak Time | Effectiveness | Harshness on Tubers | OMRI Listed? | Pros | Cons |
|---|---|---|---|---|---|---|---|
| Diluted Bleach | 1 part bleach to 10 parts water (10% solution) | 30 seconds – 1 minute | Kills bacteria, fungi, and some viruses | Harsh – Can damage tuber skin if overused | ❌ No | ✔ Cheap and easily available ✔ Quick soak time ✔ Effective against common pathogens |
✘ Harsh on tubers if not diluted properly ✘ Short residual protection ✘ Can degrade eyes if left too long |
| Hydrogen Peroxide (3%) | 1 part hydrogen peroxide to 10 parts water (about 1.5 cups per gallon) | 5–10 minutes | Oxidizes bacteria and fungi, adds oxygen to tubers | Gentle – Safer than bleach, but can still dry out tubers if overused | ✅ Yes | ✔ Gentle on tubers ✔ Adds oxygen, promoting healing ✔ No toxic residue ✔ Organic-friendly |
✘ Less effective against some bacterial infections ✘ Can dry out tubers if left too long |
| Physan 20 | 1 tablespoon (15 mL) per gallon of water | 10–15 minutes | Broad-spectrum disinfectant against fungi, bacteria, algae, and viruses | Moderate – Stronger than hydrogen peroxide, but gentler than bleach | ❌ No | ✔ Longer residual protection ✔ Works well in humid storage conditions ✔ More targeted for fungal and bacterial issues |
✘ Not organic-certified ✘ Can cause tubers to dry out if overused ✘ Requires longer soak time |

Parts of a Dahlia Tuber
Before diving into splitting dahlia clumps, it's important to understand the basic parts of a dahlia tuber and how they determine viability.

Freshly washed and ready to divide, this clump shows a tuber’s crown with a visible eye—marked by the tip of the clippers.
Crown
The crown is the top part of the tuber where it connects to the plant's stem. This is also where eyes develop—growth nodes from which a new plant will sprout.
Eyes can appear as small, round, or oval swellings and may be deep purplish-red, pink, white, cream, or even pale yellow. However, not all eyes are immediately visible after lifting or when pulling tubers out of storage. Some develop later during storage, especially if the tubers are kept warm enough to break dormancy.
Dahlia tubers remain dormant at colder temperatures and typically begin breaking dormancy around 50°F (10°C) or warmer. If stored at lower temperatures, eye development may be delayed until conditions warm up in spring. As dormancy breaks, eyes may darken, swell, or become more pronounced, making them easier to identify before dividing.
Additionally, we often see growth emerging from any remaining stem material before the crown itself begins to sprout. This can sometimes cause concern, as growers may not immediately spot viable eyes on the tuber. However, as the tuber continues waking up, true eyes will typically appear on the crown itself, where the plant will develop new growth.
A healthy crown should be firm to the touch. If the crown is soft, mushy, or discolored, this could indicate crown rot, a bacterial or fungal infection that can spread to other tubers in storage. Tubers with crown rot should be discarded to prevent contamination.
Not all tubers will develop viable eyes. For example:
Tubers growing from the bottom of another tuber will not have an eye unless they contain part of the crown.
Viable eyes only emerge from the crown, not from individual tubers themselves, though sometimes the crown is heavily integrated into the tuber to make it appear that the eye is sprouting from the dahlia tuber itself.
Some tubers may appear to have an eye but remain dormant or fail to sprout, particularly if damaged or too old.
When dividing dahlias, a viable tuber must have at least 1 cm of the crown attached to the eye for successful growth.
A dahlia tuber without eyes is considered "blind" and will not develop into a plant.

A close-up of the crown reveals visible eyes and the thick, sturdy neck connecting the crown to the tuber body. Some varieties have long, lanky necks or barely any neck at all, but this one stands out with its robust structure.
Neck
The neck is the most fragile part of a dahlia tuber, connecting the crown to the body. If the neck breaks completely, the tuber is no longer viable because it severs the connection between stored energy and the sprouting eye.
Some varieties naturally produce thinner or weaker necks, making them more prone to snapping during lifting or handling.
However, if a tuber has an eye and a partially broken neck, some growers attempt to start it in a propagation tray with extra humidity and care, similar to propagating from cuttings. While not always successful, this method can sometimes work, at least to hopefully pull a couple of cuttings from.

Body
The body of the tuber is where the plant stores energy for the next growing season.
When dividing, we trim a small piece off the end of the tuber body to inspect for disease. Signs of concern include:
Brown centers or streaks – Indicates fungal or bacterial infection.
Soft rot – If confined to a small area, the affected part can sometimes be cut away until healthy tissue is exposed.
Mother tubers, which are the original tubers planted the previous season, often degrade and may not be viable for another season.
While larger tubers tend to store better, thin or weak tubers may dry out too quickly in storage or fail to sprout in spring. A general rule of thumb is that dahlia tubers are viable as long as they are at least the size of an AAA battery—about 10.5 mm in diameter and 44.5 mm in length.
That said, variety and climate matter. If it’s a variety you especially want to save, keeping a smaller tuber may be worth the risk. However, in our arid climate, we discard any tubers smaller than a C battery—about 26.2 mm in diameter and 50 mm in length—unless the tuber is particularly stout and well-formed.
We take this approach because we want to focus on growing strong, healthy plants that will produce high-quality tubers for future seasons. In our experience, smaller tubers tend to produce smaller plants and smaller tubers, which can lead to weaker stock over time. While some growers report success with tiny tubers, we’ve found that larger, well-formed tubers lead to stronger, more productive plants, especially in our arid climate.
However, there is another side to this coin. We’ve also encountered oversized dahlia tubers, particularly mother tubers that have grown over multiple seasons. These older, oversized tubers often produce fewer viable tubers and may lack vigor when replanted. Because of this, we also discard excessively large tubers, as we’ve found that moderate-sized, healthy tubers yield the best results for propagation.

Dahlia Variety Differences & Tuber Size Expectations
Some dahlia varieties naturally produce larger tubers, such as Cafe au Lait and Shiloh Noelle, while others, like Rose Toscano, tend to have smaller tubers. When deciding which tubers to keep, we also factor in the growth habits of each variety, as some naturally produce bigger tubers without sacrificing productivity, while others do just as well with smaller but well-formed tubers.
Now that we understand the basic anatomy of dahlia tubers and what makes them viable, let’s dive into dividing the clumps!

Step-by-Step Process to Dividing Dahlia Tubers


Prepare Your Workstation
Gather all necessary tools.
Prepare your sanitation solution for cutting tools and divided dahlia tubers.
Remove & Inspect Dahlia Clumps
Take dahlia tuber clumps out of storage, brushing off any remaining storage medium or excess soil from lifting.
Visually inspect each clump, checking for any suspicious eyes or growth that may indicate gall infection, as well as any soft or decaying tubers that could suggest rot.
Rinse & Clean Up the Clump
Give the dahlia clumps a good rinse, focusing on the crown area.
Before dividing, I focus on cleaning up the clump by checking for weak necks or broken tubers and removing those first.
After the initial cleanup, identify viable eyes—these will guide where to start cutting.


Separate & Divide Tubers
Some clumps have multiple stems, with each stem representing an individual clump. I start by separating these carefully, cutting away from the others while preserving as many viable tubers and eyes as possible. This takes finesse—cutting appropriately while gently untangling tubers.
At this stage, I also assess tubers that may be worth “sacrificing”—small, weak, or damaged tubers that aren’t ideal for replanting.
Some clumps are easy to divide with fine-tipped harvesting shears or a floral knife, cutting tubers directly from the crown.
If cutting individual tubers feels daunting, an alternative method is quartering the stem, making cuts that avoid as many eyes as possible—though some losses are to be expected.


Check for Tuber Health
Continue dividing the clump until complete, discarding any unviable tubers, stems, or roots.
Use a sharp knife to trim a small portion of the bottom of each tuber.
Check the tissue:
Healthy tubers should be white and fleshy.
Brown or black streaking = discard.
Brown center = trim further until only healthy tissue remains. If rot extends too far, discard the tuber.
A viable tuber should still have enough storage tissue left to sustain early growth—at least ⅓ of the tuber body remaining. If too much is removed, the tuber may not have enough energy to produce strong growth.


Sanitize & Dry Tubers
Place tubers into the sanitation solution, following the manufacturer’s directions. (We use diluted bleach and soak tubers for 30 seconds to 1 minute.)
Pro-tip: If a tuber floats to the surface, it’s best to discard it. In our experience, floaters tend to shrivel in storage and rarely survive.
Sanitize cutting tools at this time as well.
Label tubers with variety names (we use flagging tape).
Place tubers on a well-ventilated drying surface, such as a Bootstrap Farmer mesh tray or bulb crate, in a warm, dark location away from direct sunlight.
Allow tubers to dry until they feel dry to the touch — paying special attention to the crown and stems, as they take longer to dry. This process typically takes 1–3 days. Be careful not to let them dry so long that they begin to shrivel. Keep them out of direct sunlight during the drying process.
Labeled dahlia tubers resting in pine shavings inside a storage container, keeping them safe and dry through the winter. Proper labeling and cushioning help ensure healthy, vibrant blooms come spring.
Store & Monitor Tubers
Once dry, label tubers using a sharpie or garden marker, tally if needed, and repack into smaller containers with vermiculite or pine shavings for insulation. Maintain adequate humidity to prevent dehydration, but avoid excess moisture that could lead to rot.
Store in a cool, dark location where temperatures stay above freezing but below 50°F, ideally between 40°F–50°F.
Check periodically for any signs of rot or dehydration, removing any compromised tubers to prevent spread.
When ready to plant, if tubers haven’t naturally broken dormancy, move them to a slightly warmer location (50°F–60°F) to gently wake them up before planting.
Dahlias that are actively sprouting will be eager to grow and, under proper conditions, less prone to rot.

Plan for Planting
Dahlia tubers cannot be stored long-term beyond the winter months. While properly stored tubers can remain viable through the dormant period, they will eventually dehydrate or rot if kept too long without planting. Aim to plant after the danger of frost has passed, when soil temperatures are ideally 55°F or warmer.
If you have extra tubers that you won’t be planting, consider sharing them with fellow growers to ensure they get planted in time.
For those wanting to take cuttings, tubers can be potted up indoors 4–6 weeks before your last frost to encourage early sprouting and multiple shoots for propagation.

Conclusion: The Labor of Love That Keeps on Blooming
Lifting, dividing, and storing dahlias is truly a labor of love—a process that takes time, patience, and care. But for those who grow them, it’s always worth it. Each tuber tucked away for winter holds the promise of next season’s blooms—an investment not just in flowers, but in the joy they bring.
Through years of growing dahlias, we’ve refined our methods, learned from experience, and found what works best to keep our plants healthy, productive, and thriving year after year. Whether you’re expanding your dahlia collection, preventing disease, or simply ensuring your favorite varieties return in full glory, this process is an essential part of dahlia growing.
For even more tips on growing, planting, and caring for dahlias, check out our Dahlia Growing Guide. And if you're a visual learner, be sure to watch our videos on lifting, dividing, and storing dahlia tubers below!

We are looking foreward to sharing more blooms with your soon.
Jessica & Graham
Recommended Tools & Supplies for Dividing Dahlias
Dividing dahlias is much easier when you have the right tools on hand. Here are the products mentioned in this blog post that I use regularly when dividing and storing dahlia tubers. Click the buttons to check them out!
Cutting Tools
Tools designed for precise cuts and handling thick stems and roots.
Cleaning & Curing Supplies
Tools and materials that help keep tubers clean and properly stored.
Labeling & Organization
Stay organized while processing and storing tubers.
Protective Gear
Keep yourself clean and safe while working with tubers.